Troubleshoot Bridge Issues
Bridge transactions can take some time (hours in extreme cases) to complete depending on Ethereum mainnet congestion. Try these actions first if your transaction has been pending for 10 minutes or more (and you don't want to wait any more time). Actions differ depending on if you are transferring from xDai to Dai or Dai to xDai.
If you are using OmniBridge for other ERC20 tokens (not xDai to Dai) please see the OmniBridge page. This guide only addresses issues with xDai to Dai transfers.
Things to know
- A bridge exit (moving from xDai to Dai) requires 2 transactions, one to initiate the transfer on Gnosis, and a 2nd to claim DAI on Ethereum.
- To process the 2nd transaction, you will need to switch to Ethereum Mainnet in MetaMask and you will need Ether to pay gas fees.
- The 2nd transaction may take quite a long time, it is being processed on Ethereum. You can set a higher gas price if you want to speed it up. Instructions.
- If you closed the UI before starting the 2nd transaction, you can come back and to complete later. Instructions.
- Additional troubleshooting items below.
Bridge UI is Offline or in Maintenance Mode
We are doing some periodic maintenance and optimization on the Bridge and are now putting the UI into maintenance mode during these times to avoid additional confusion and/or delayed transactions for users. If you started a transaction but it did not complete because of maintenance mode, be assured that funds are safe and will be available once maintenance is complete. If you have questions or concerns during maintenance, please contact us in Discord channel for up-to-date information.
I Only See Bridging in 1 Direction
The bridge is dynamic and supports bi-directional bridging**. It will shift automatically when you update your web3wallet (MetaMask) to the correct chain**. When you are on Ethereum Mainnet, you will see the Eth-Mainnet to Gnosis side, and when you are on Gnosis, you will see the Gnosis to Eth Mainnet side. You can adjust which side through the Bridge toggle in menu, however to initiate a transfer you will need your wallet set to the correct chain.
I Transferred xDai to Dai but it's Not Working
A new bridge decentralization feature means withdrawals now require 2 steps. You must
- initiate the bridge transaction on Gnosis
- Claim your Dai on Ethereum.
There are currently different bridging UIs, and depending on the UI you may need to take different steps to complete the process.
I Used the xDai Bridge UI
When using the xDai bridge, we recommend Chrome and MetaMask. It is also useful to disable ad-blockers, as there are popups which guide you through the process. A successful transfer process is documented here.
If you submitted a tx on Gnosis, but not complete the claim process, return to the Bridge UI and connect your MetaMask wallet with the account you used previously.
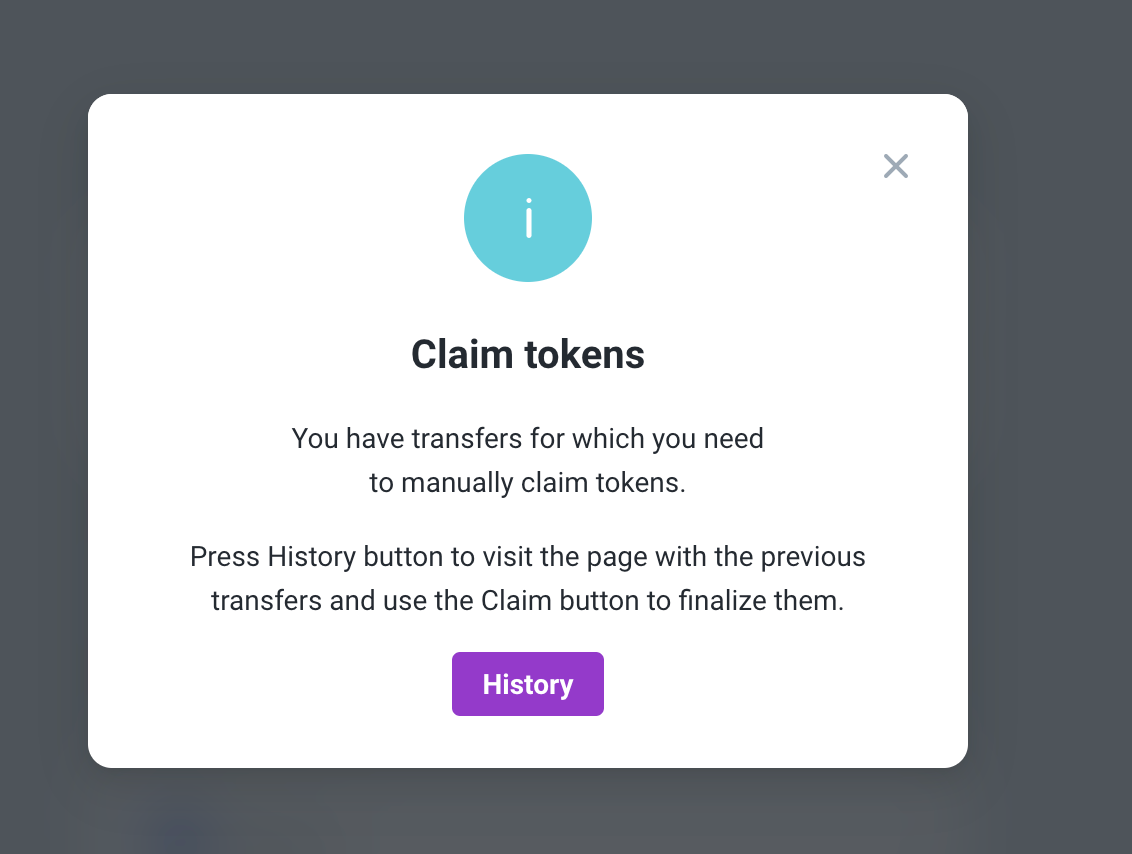
1) Switch MetaMask to the ETH Mainnet. If you have unclaimed txs you should see the following popup. Click on History.
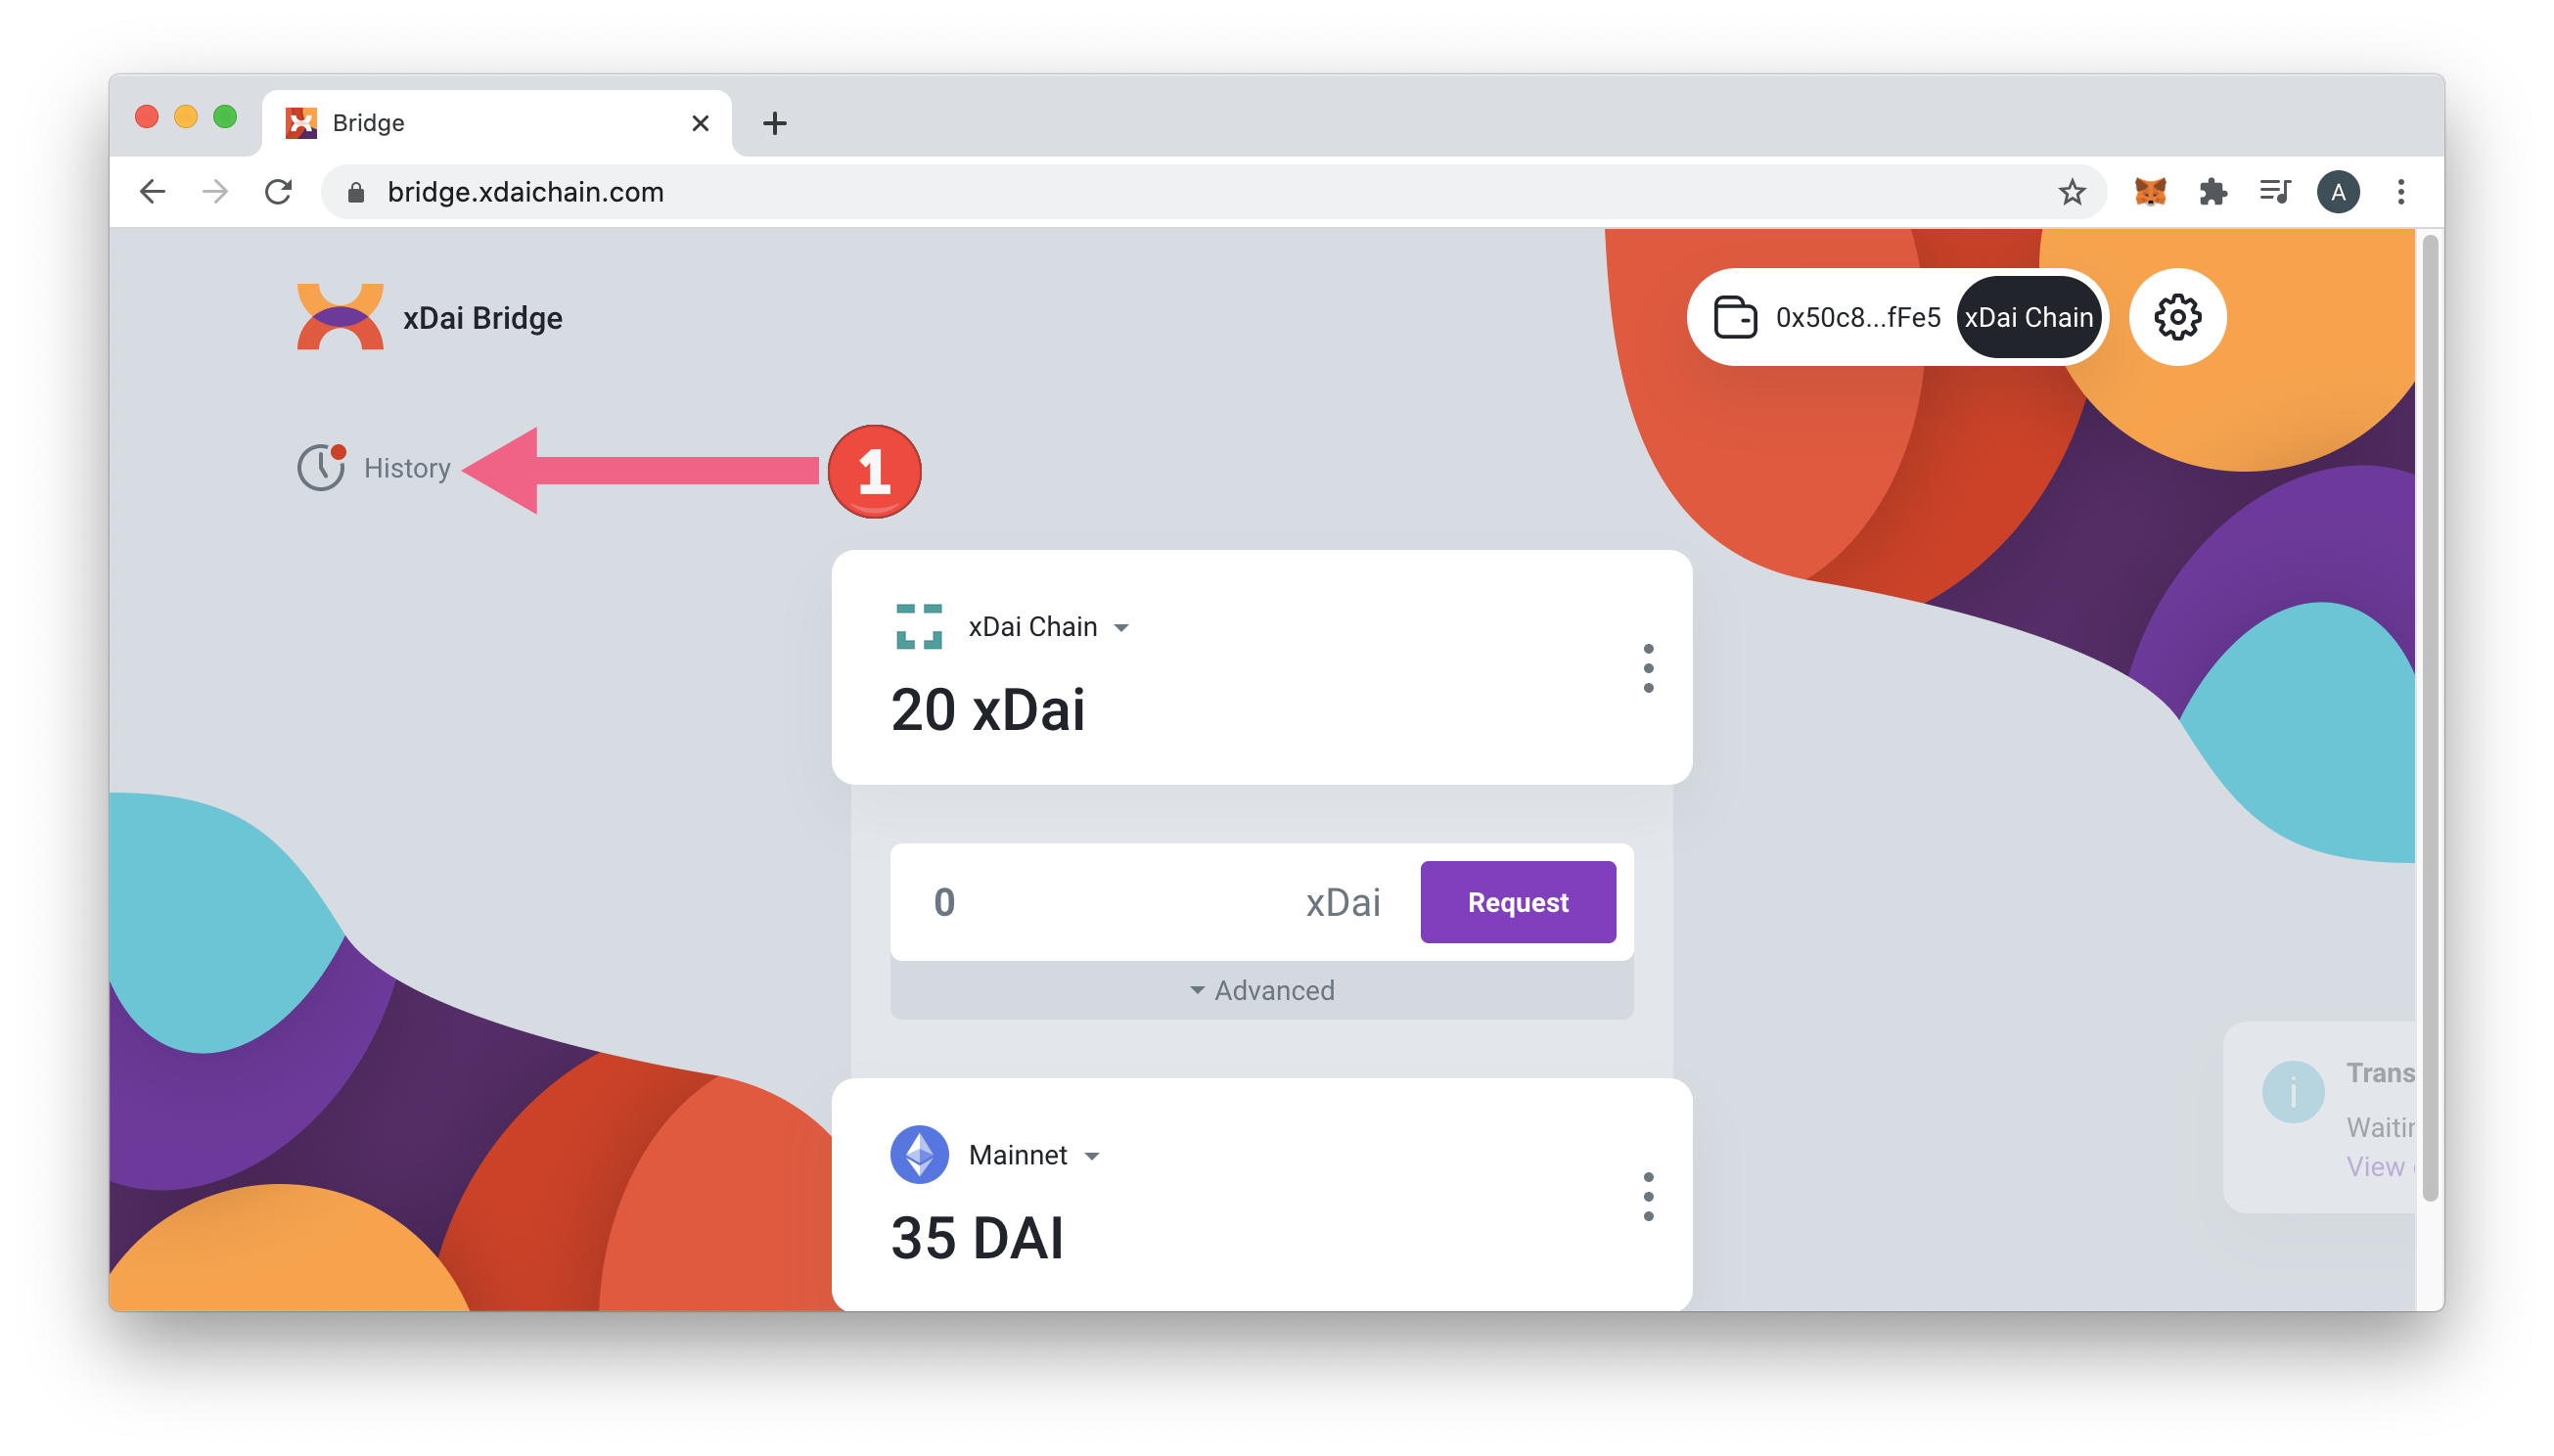
2) If you are in the Bridge UI, you can also click on History to view.
- Filter by Unreceived Transactions and click the Claim button to begin the process. MetaMask will ask you to confirm the transaction and pay the gas fees to complete the process.
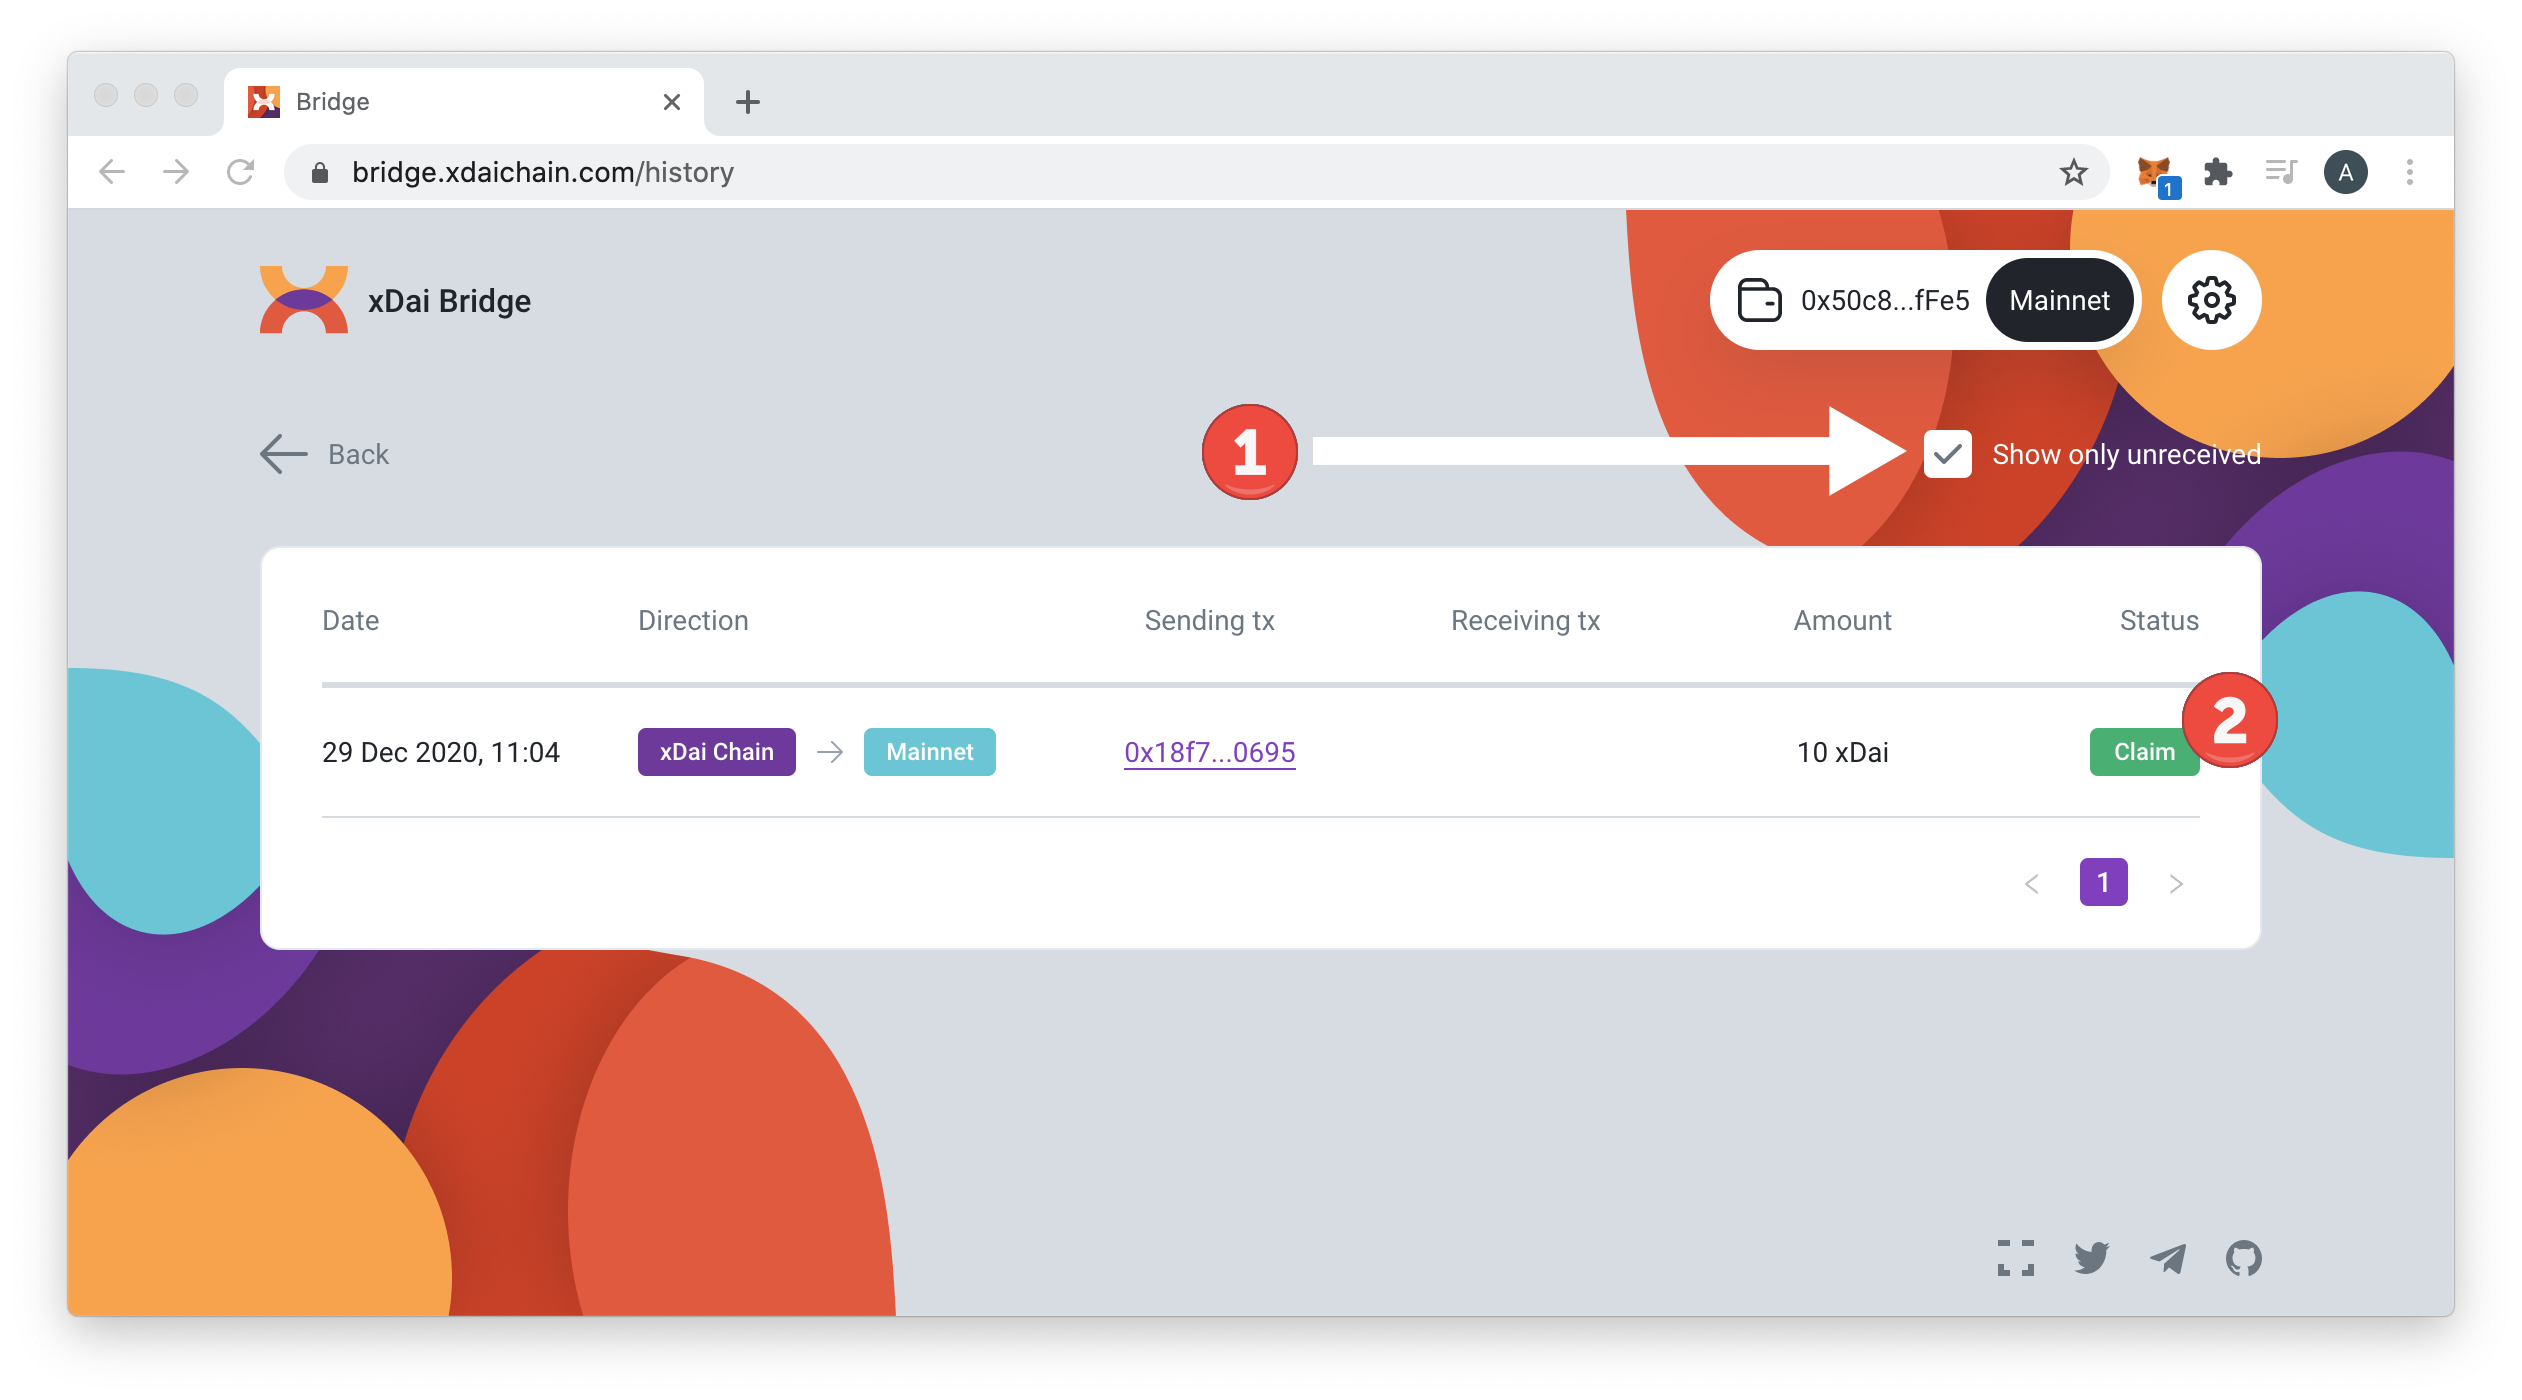

You may want to manually set gas prices for a cheaper exit.
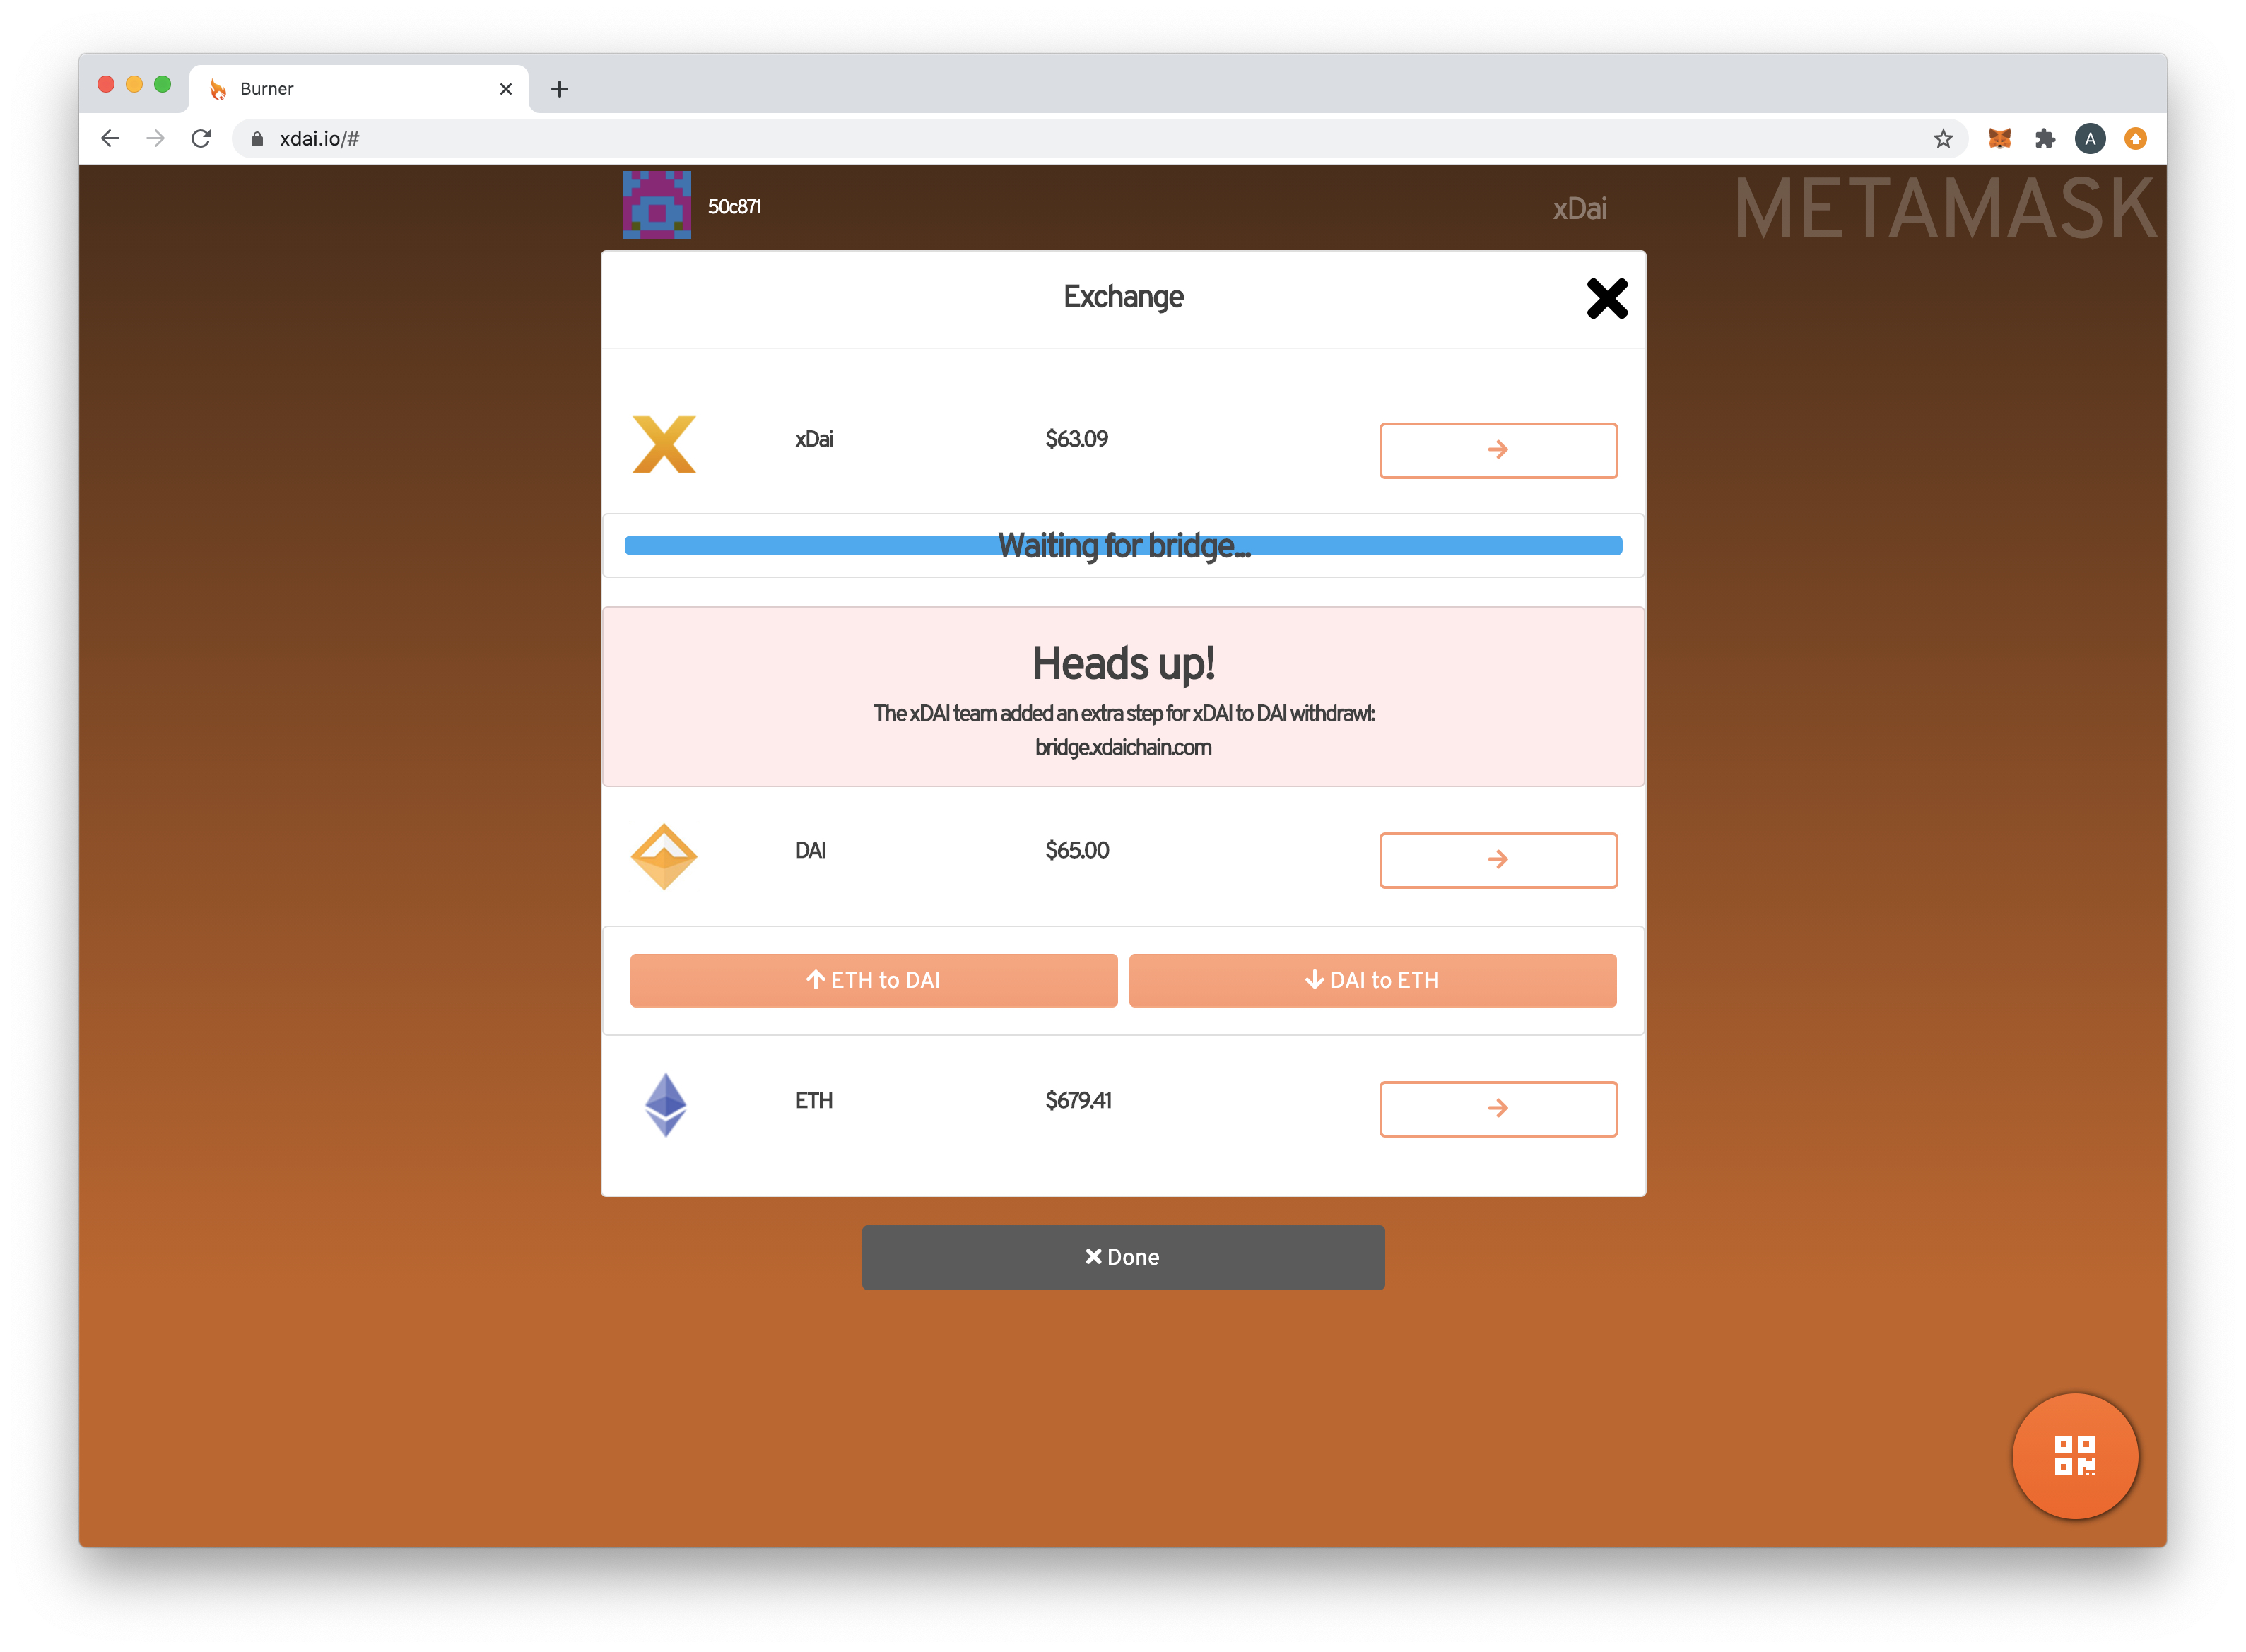
I Used Burner Wallet at xDai.io
If you initiated a transfer from Burner Wallet, it likely is stuck on the Waiting for Bridge message.
I'm connected to the Burner Wallet with MetaMask
You can retrieve the pending transaction using the MetaMask interface. Learn more here.
- Go to the Bridge UI at https://bridge.gnosischain.com/
- Switch your MetaMask wallet to the ETH Mainnet
- Click on History. You will see any unclaimed transactions*. (You can also filter unclaimed transactions)*
- Press the Claim button to process**.** (will not appear until 6+ minutes after the transaction)
- Confirm transaction in MetaMask and wait for tx validation.
You may want to manually set gas prices for a cheaper exit.
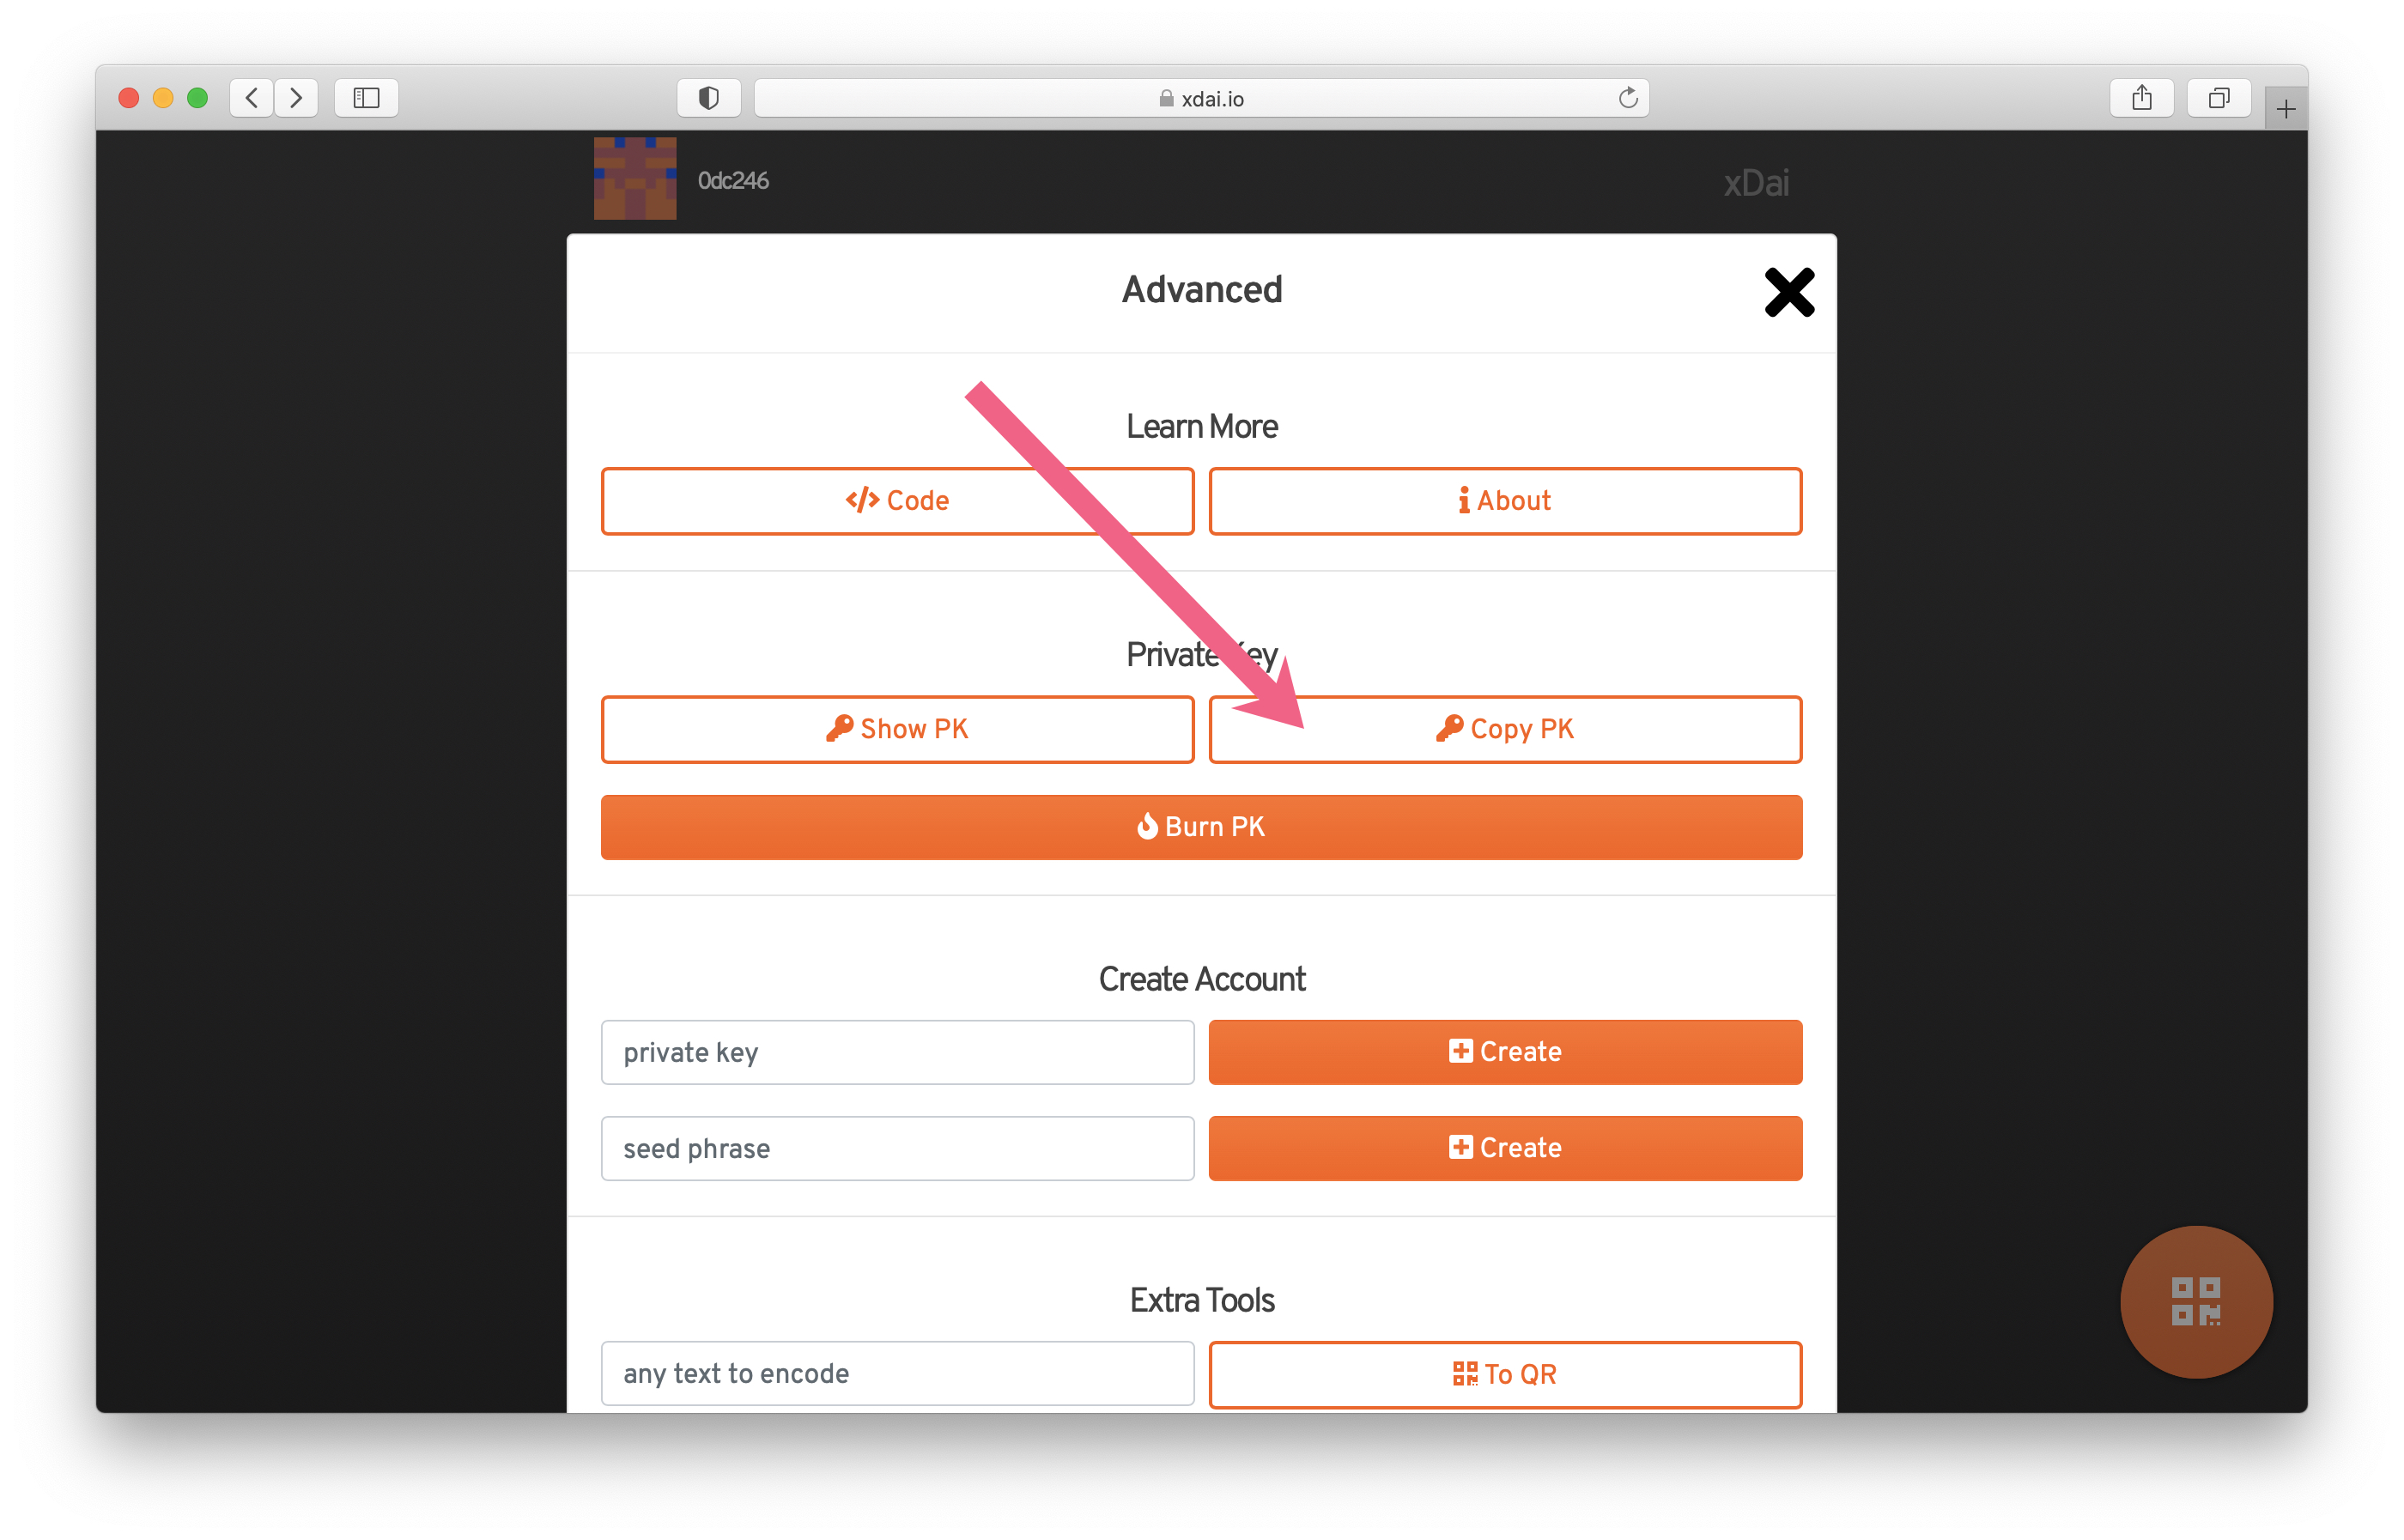
I'm using a standalone Burner Wallet
In this case, you'll want to export your private key into MetaMask to finish the conversion.
1) Click the Advanced Button.

2) Copy Private Key.
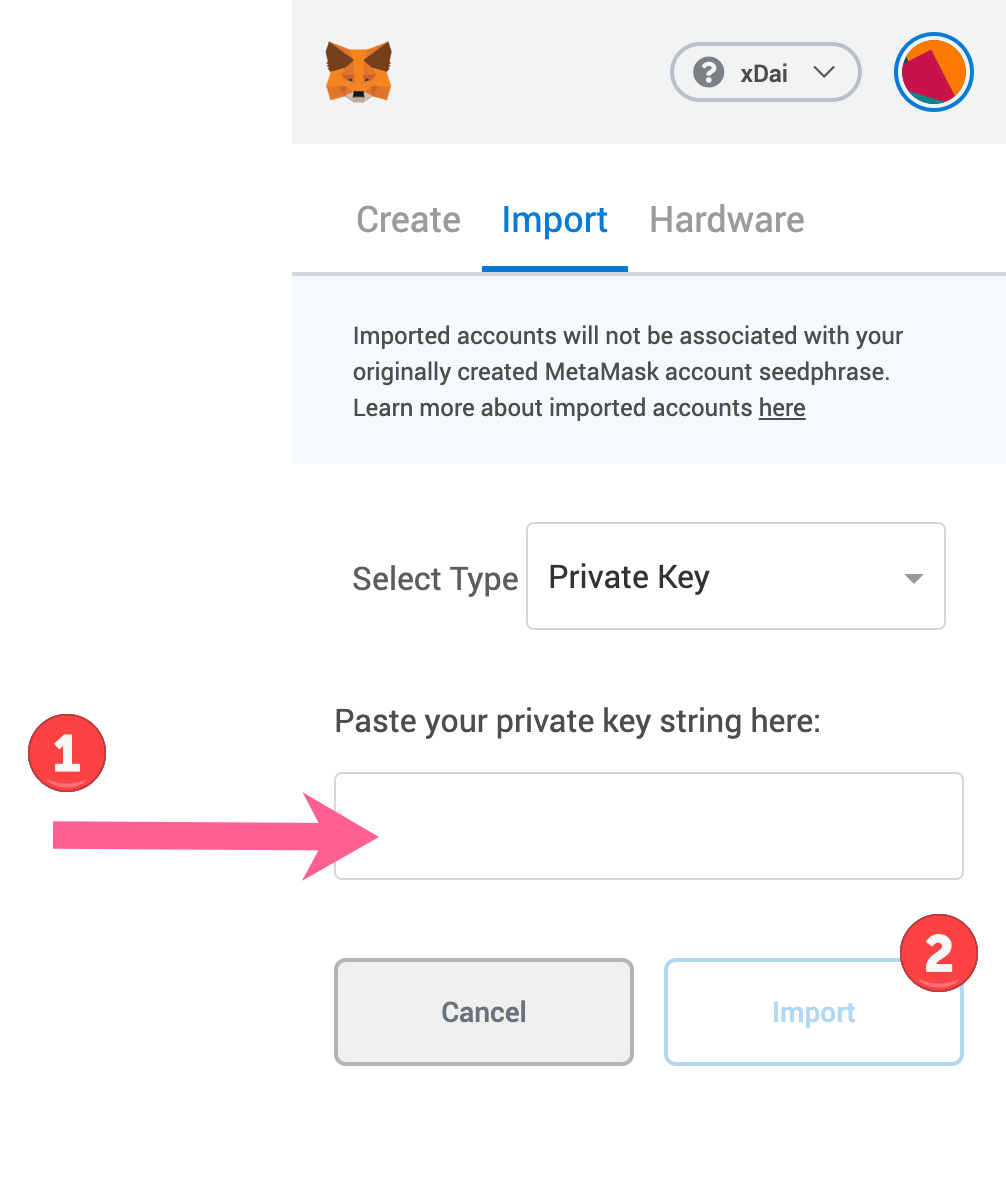
3) Open MetaMask and import the account.
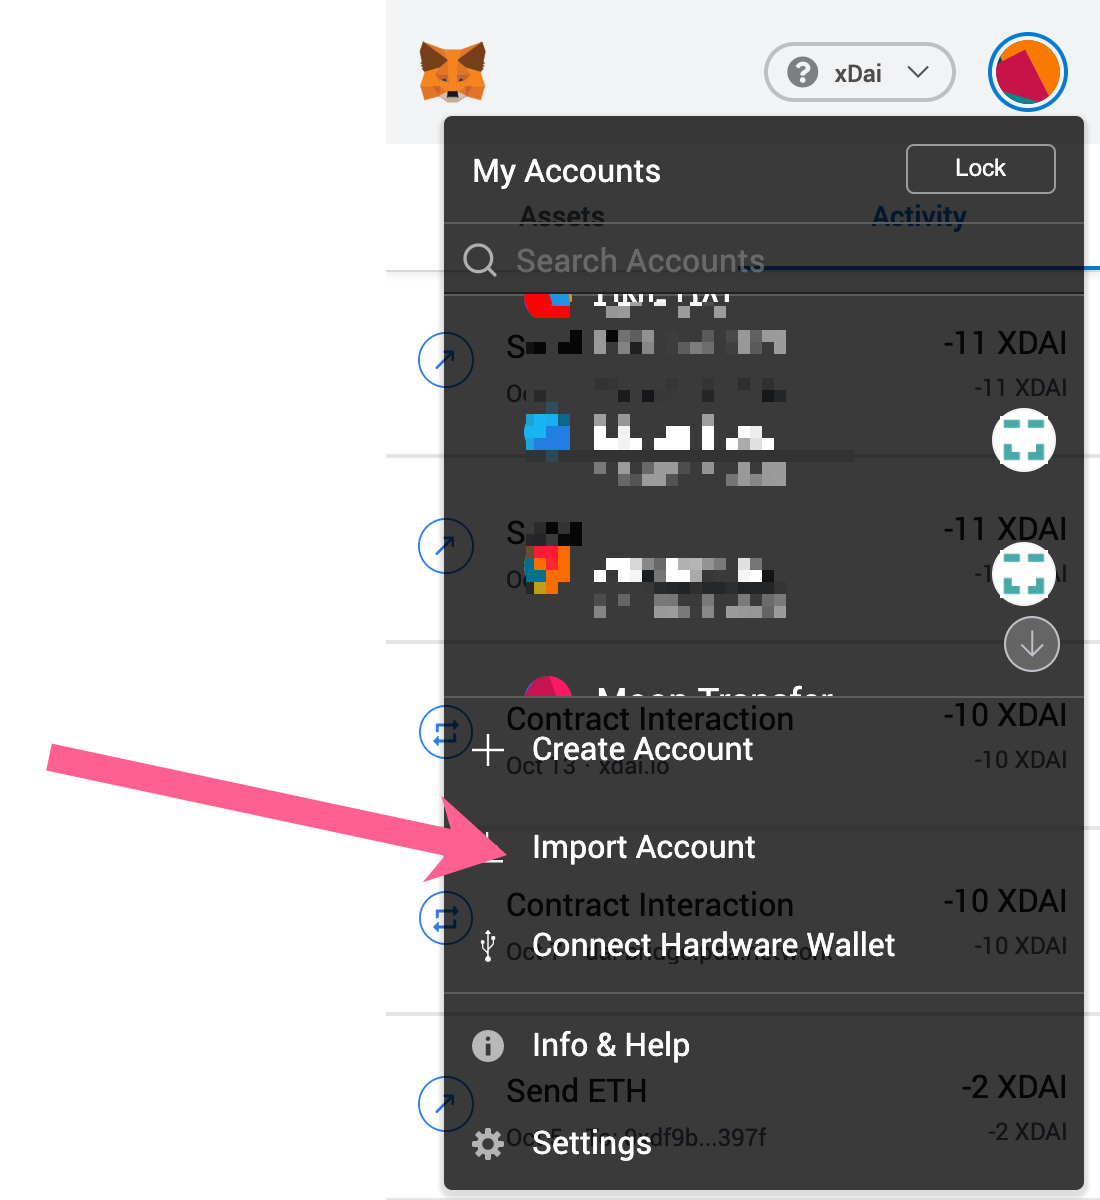
4) Paste in the private key and click Import.
5) Go to the Bridge UI at https://bridge.gnosischain.com/
- Switch your MetaMask wallet to the ETH Mainnet
- Click on History. You will see any unclaimed transactions*. (You can also filter unclaimed transactions)*
- Press the Claim button to process**.** (will not appear until 6+ minutes after the transaction)
- Confirm transaction in MetaMask and wait for tx validation.
You may want to manually set gas prices for a cheaper exit.
You will need some ETH in your wallet to pay gas fees and finalize the transaction. You can send from another account.
6) You will see a Success message when the transaction is complete.
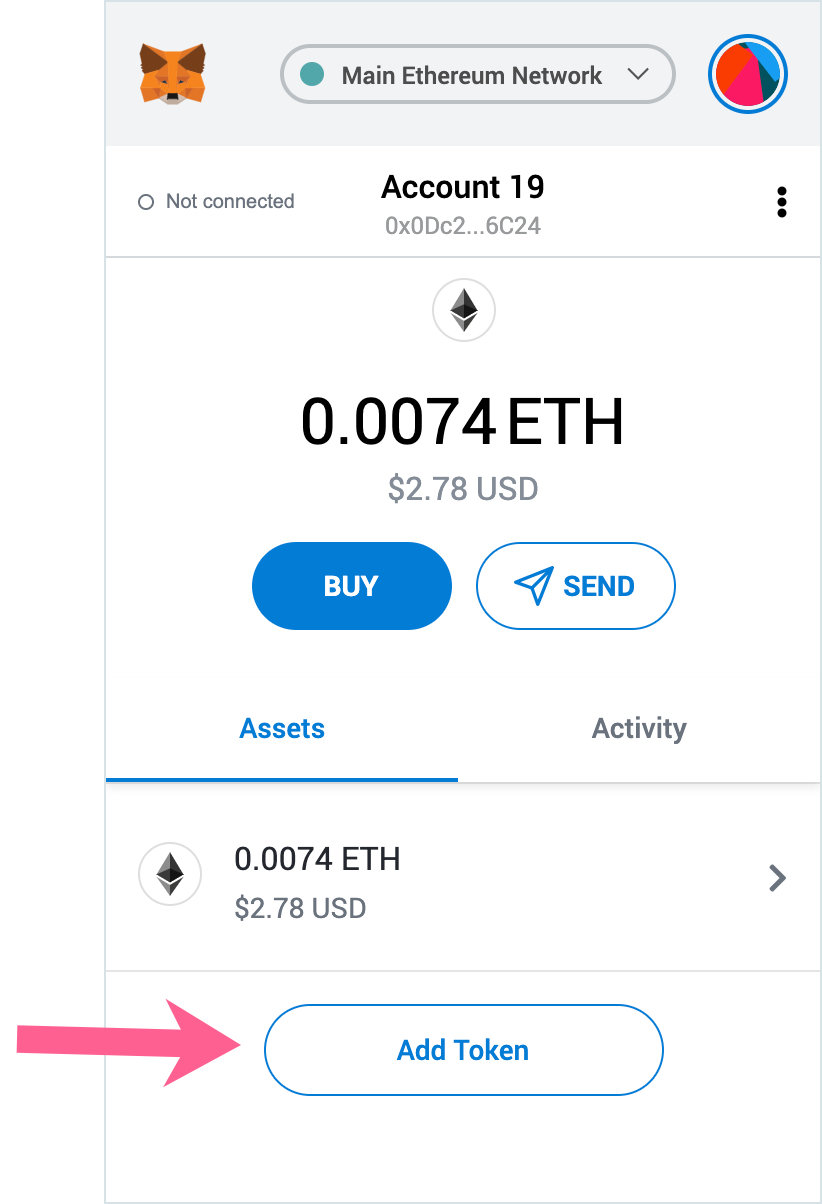
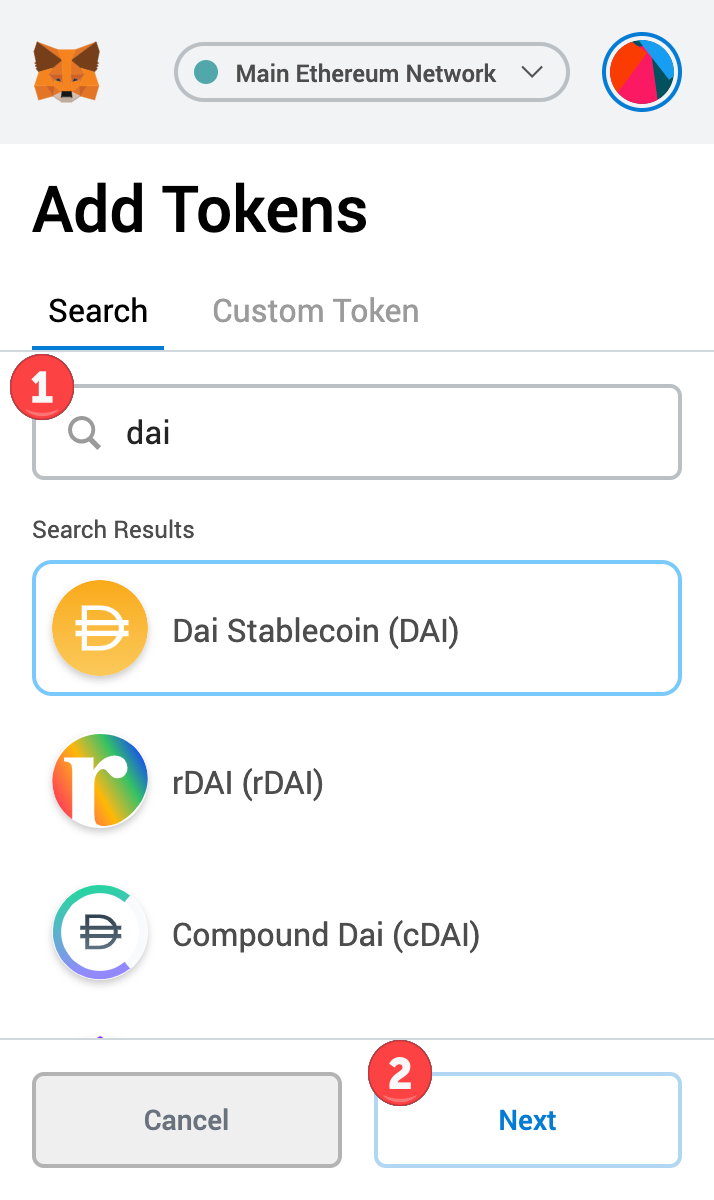
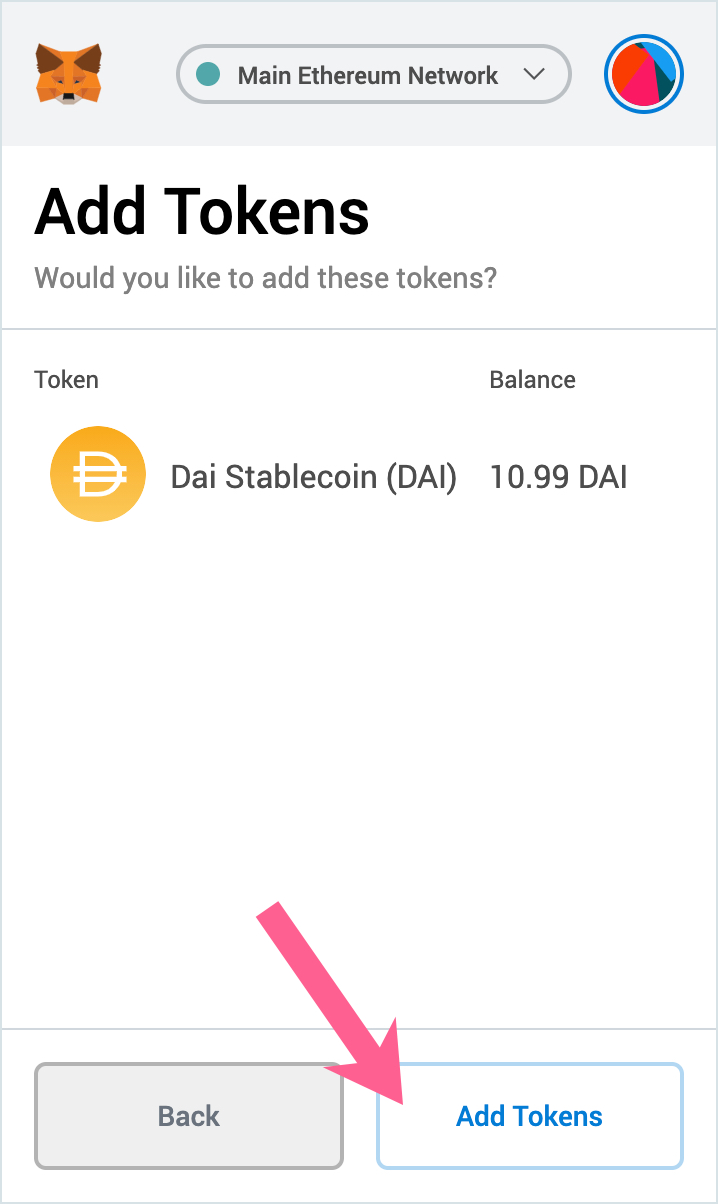
7) Add DAI as a custom token in MetaMask to view your DAI balance in the wallet.
Gas fees For an Exit Claim are Very High! How Can I Reduce Them?
You can check current gas prices at https://ethgas.watch/. If they are high at the moment, you may want to wait until later to process your transaction. https://ethereumprice.org/gas/ can help you plan for the best time of day to make the claim transaction.
If you want to go ahead with the claim, try setting MetaMask to SLOW. This may take longer to process but can save you on tx fees. You can also click on Advanced to see additional metrics and choose an exact gas price for your transaction. More information available here.
Dai to xDai Transaction is Taking a Long Time
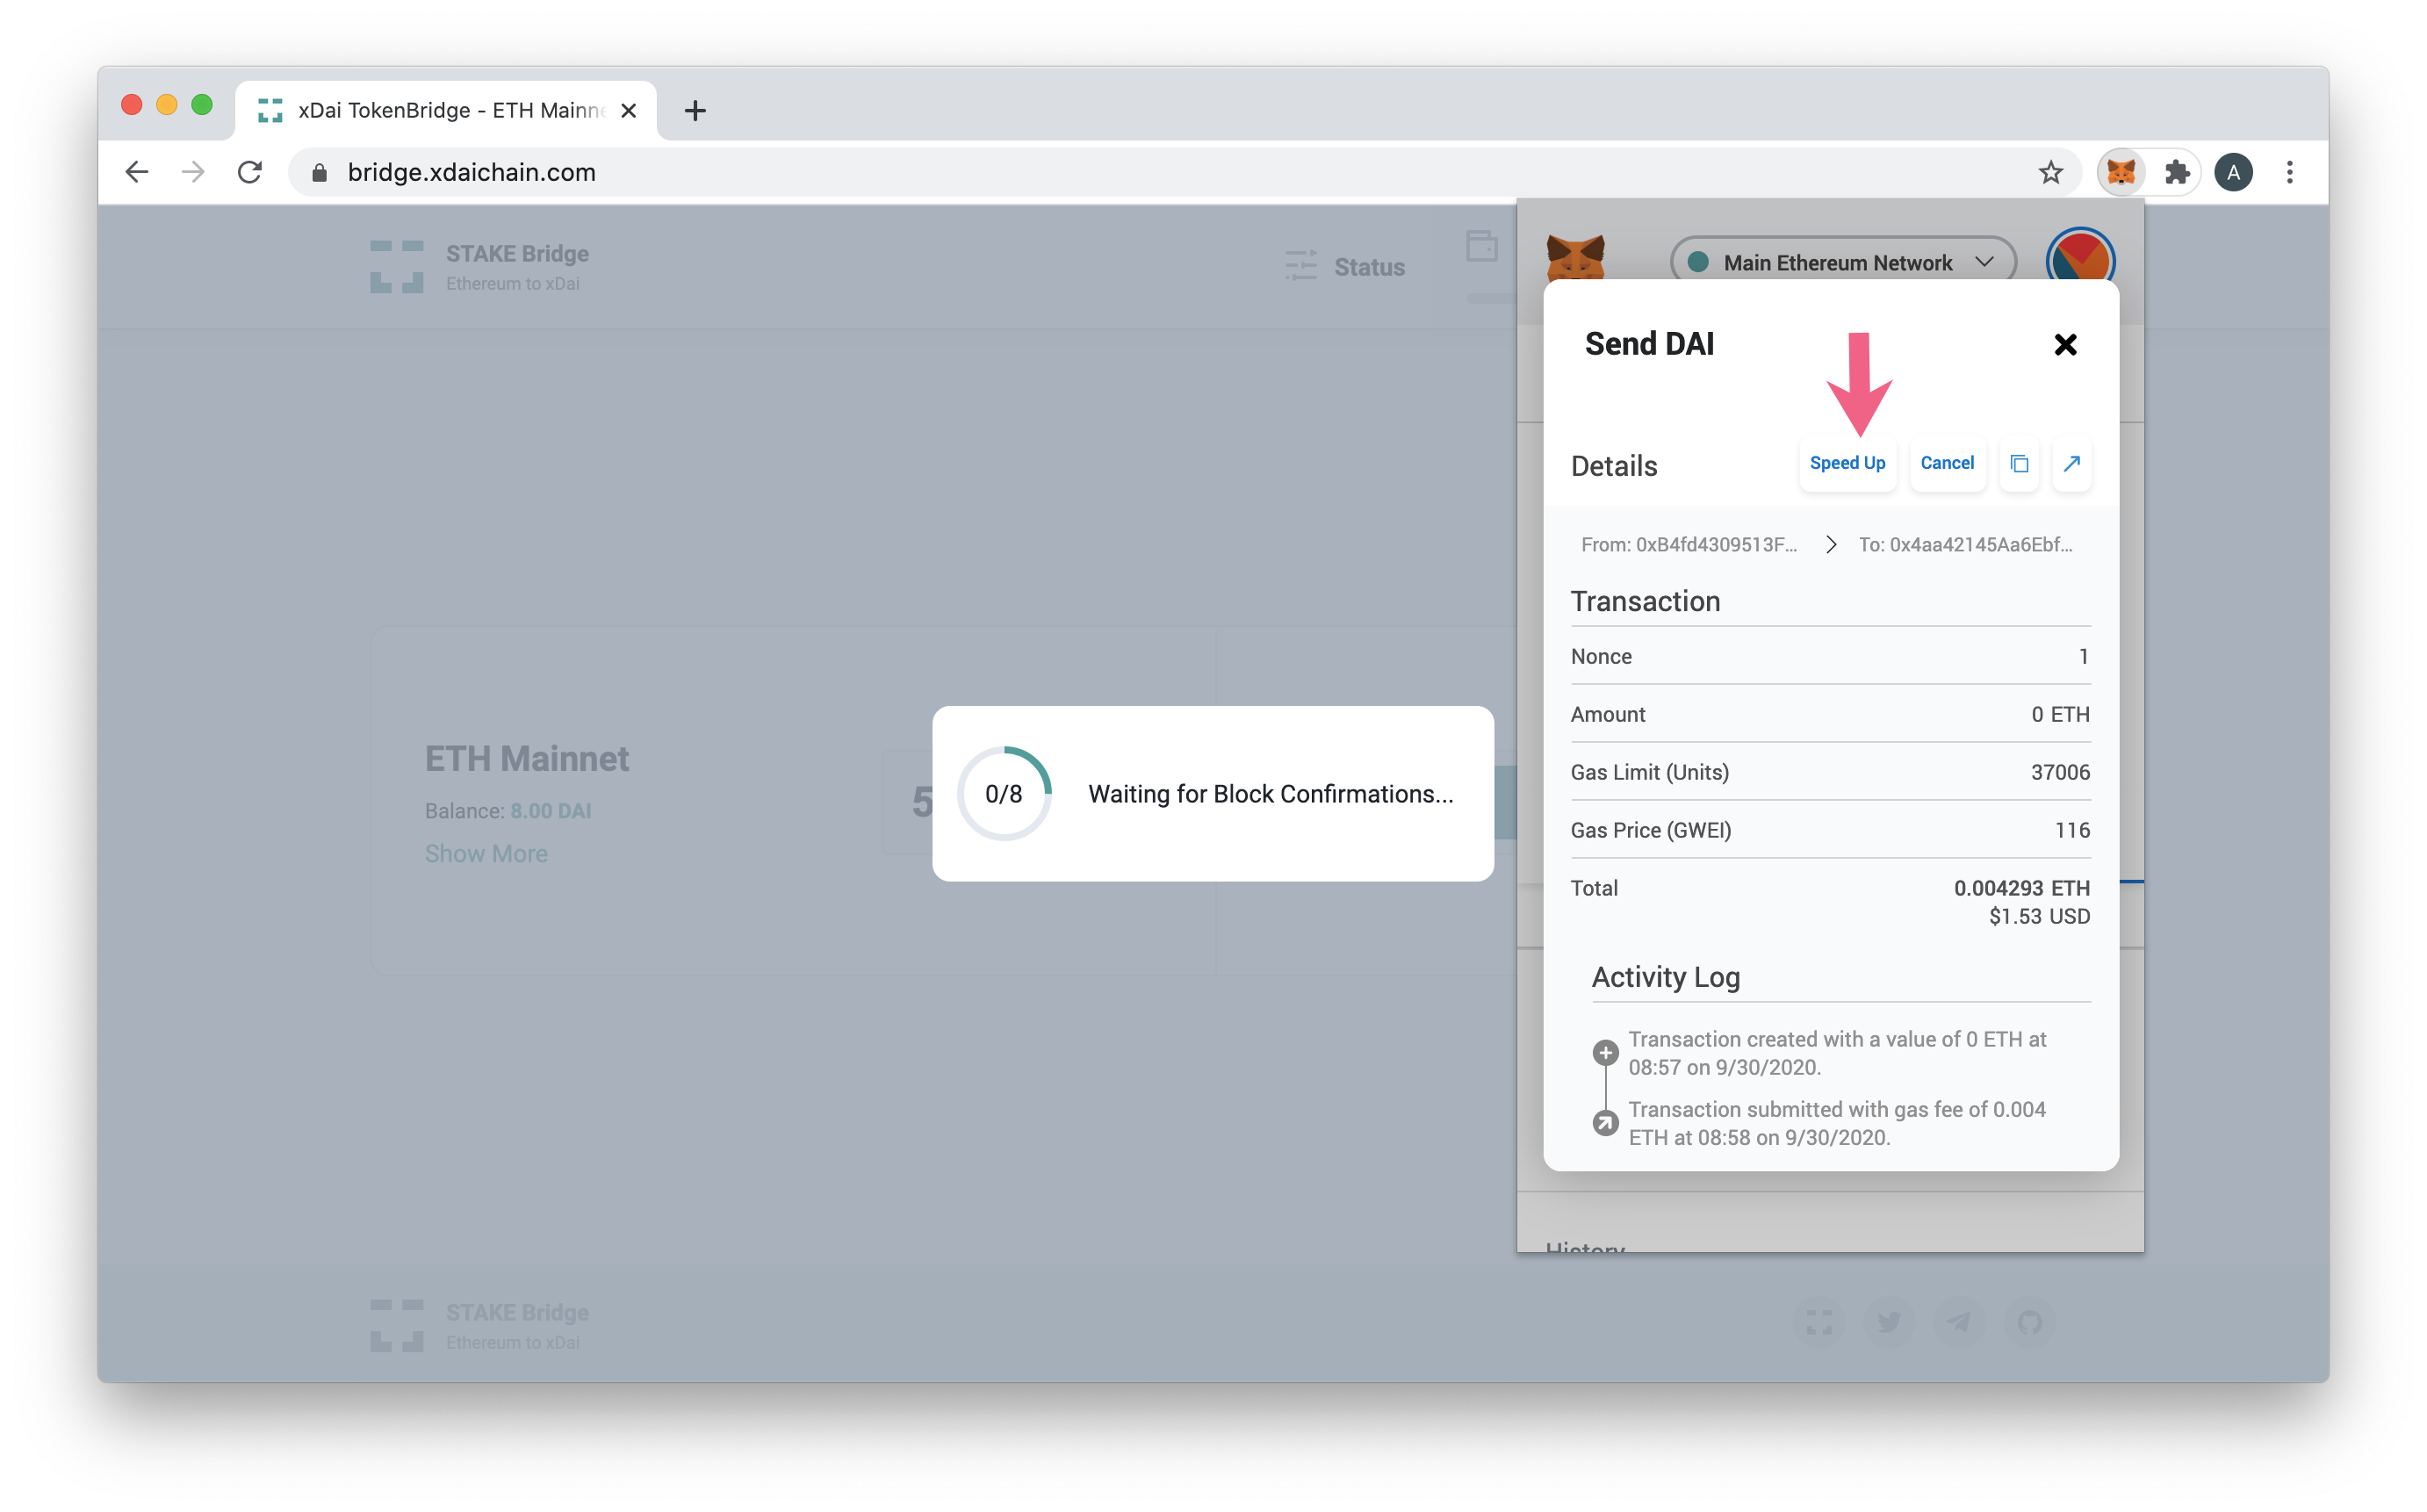
8 block confirmations are required to ensure a transaction is final and xDai can be minted to your account. If Ethereum is congested, it may take many more blocks for your transaction to be queued. If your transaction is stuck in pending for a long time, you can opt try to speed it up by:
- Selecting the pending transaction in MetaMask.
- Clicking Speed Up.
- Paying the additional gas to try and get it through more quickly.
Otherwise, it will likely be in a pending state until the congestion breaks up. If it remains in a pending state on MetaMask for a long time, see Resetting MetaMask below.
Transaction Not Showing on BlockScout or Etherscan - Resetting MetaMask.
If you initiated a transaction but don't see a pending transaction the Block Explorer (in either direction, if originating from Gnosis check BlockScout, if Ethereum check Etherscan) try resetting your MetaMask account to clear your transaction history.
This can be useful to clear up:
- A pending transaction which refuses to clear.
- A transaction fails to show up on Etherscan but is still pending.
Imported accounts will not repopulate win your wallet with this method, so be sure you have access to a private key or seed phrase to restore these in a reset account.
This troubleshooting guide from 1Hive is also helpful for instructions on resetting and dealing with other MetaMask issues.
I'm using a Ledger to Claim tokens on an xDai to Dai Bridge Transfer
To use a Ledger you need to allow contract data in order to interact with smart contracts. We assume that you have installed the Ethereum app.
- Update the firmware to the latest version.
- Connect and unlock your Ledger device.
- Open the Ethereum application.
- Press the right button to navigate to Settings. Press both buttons to validate.
- In the Contract data settings, press both buttons to allow contract data in transactions. The device displays Allowed.
- Retry your transaction.
For more help with Ledger, please see their support docs.
Find a Transaction Hash
Completing a transfer from Gnosis to Ethereum (converting xDai to Dai) requires 2 transactions.
- Initial withdrawal on Gnosis. Signatures are collected and xDai is burned.
- Claim Dai on Ethereum. Submit transaction hash containing validator confirmations.
When transferring with the Bridge UI, the tx from step 1 is copied behind the scenes and used with the claim functionality in step 2.
In some cases, however, step 2 may not process, or a different method may be used (such as a direct transfer without the UI or with another UI like a burner wallet that does not include this claim functionality) and the claim must be processed manually.
Find Transaction Hash in BlockScout
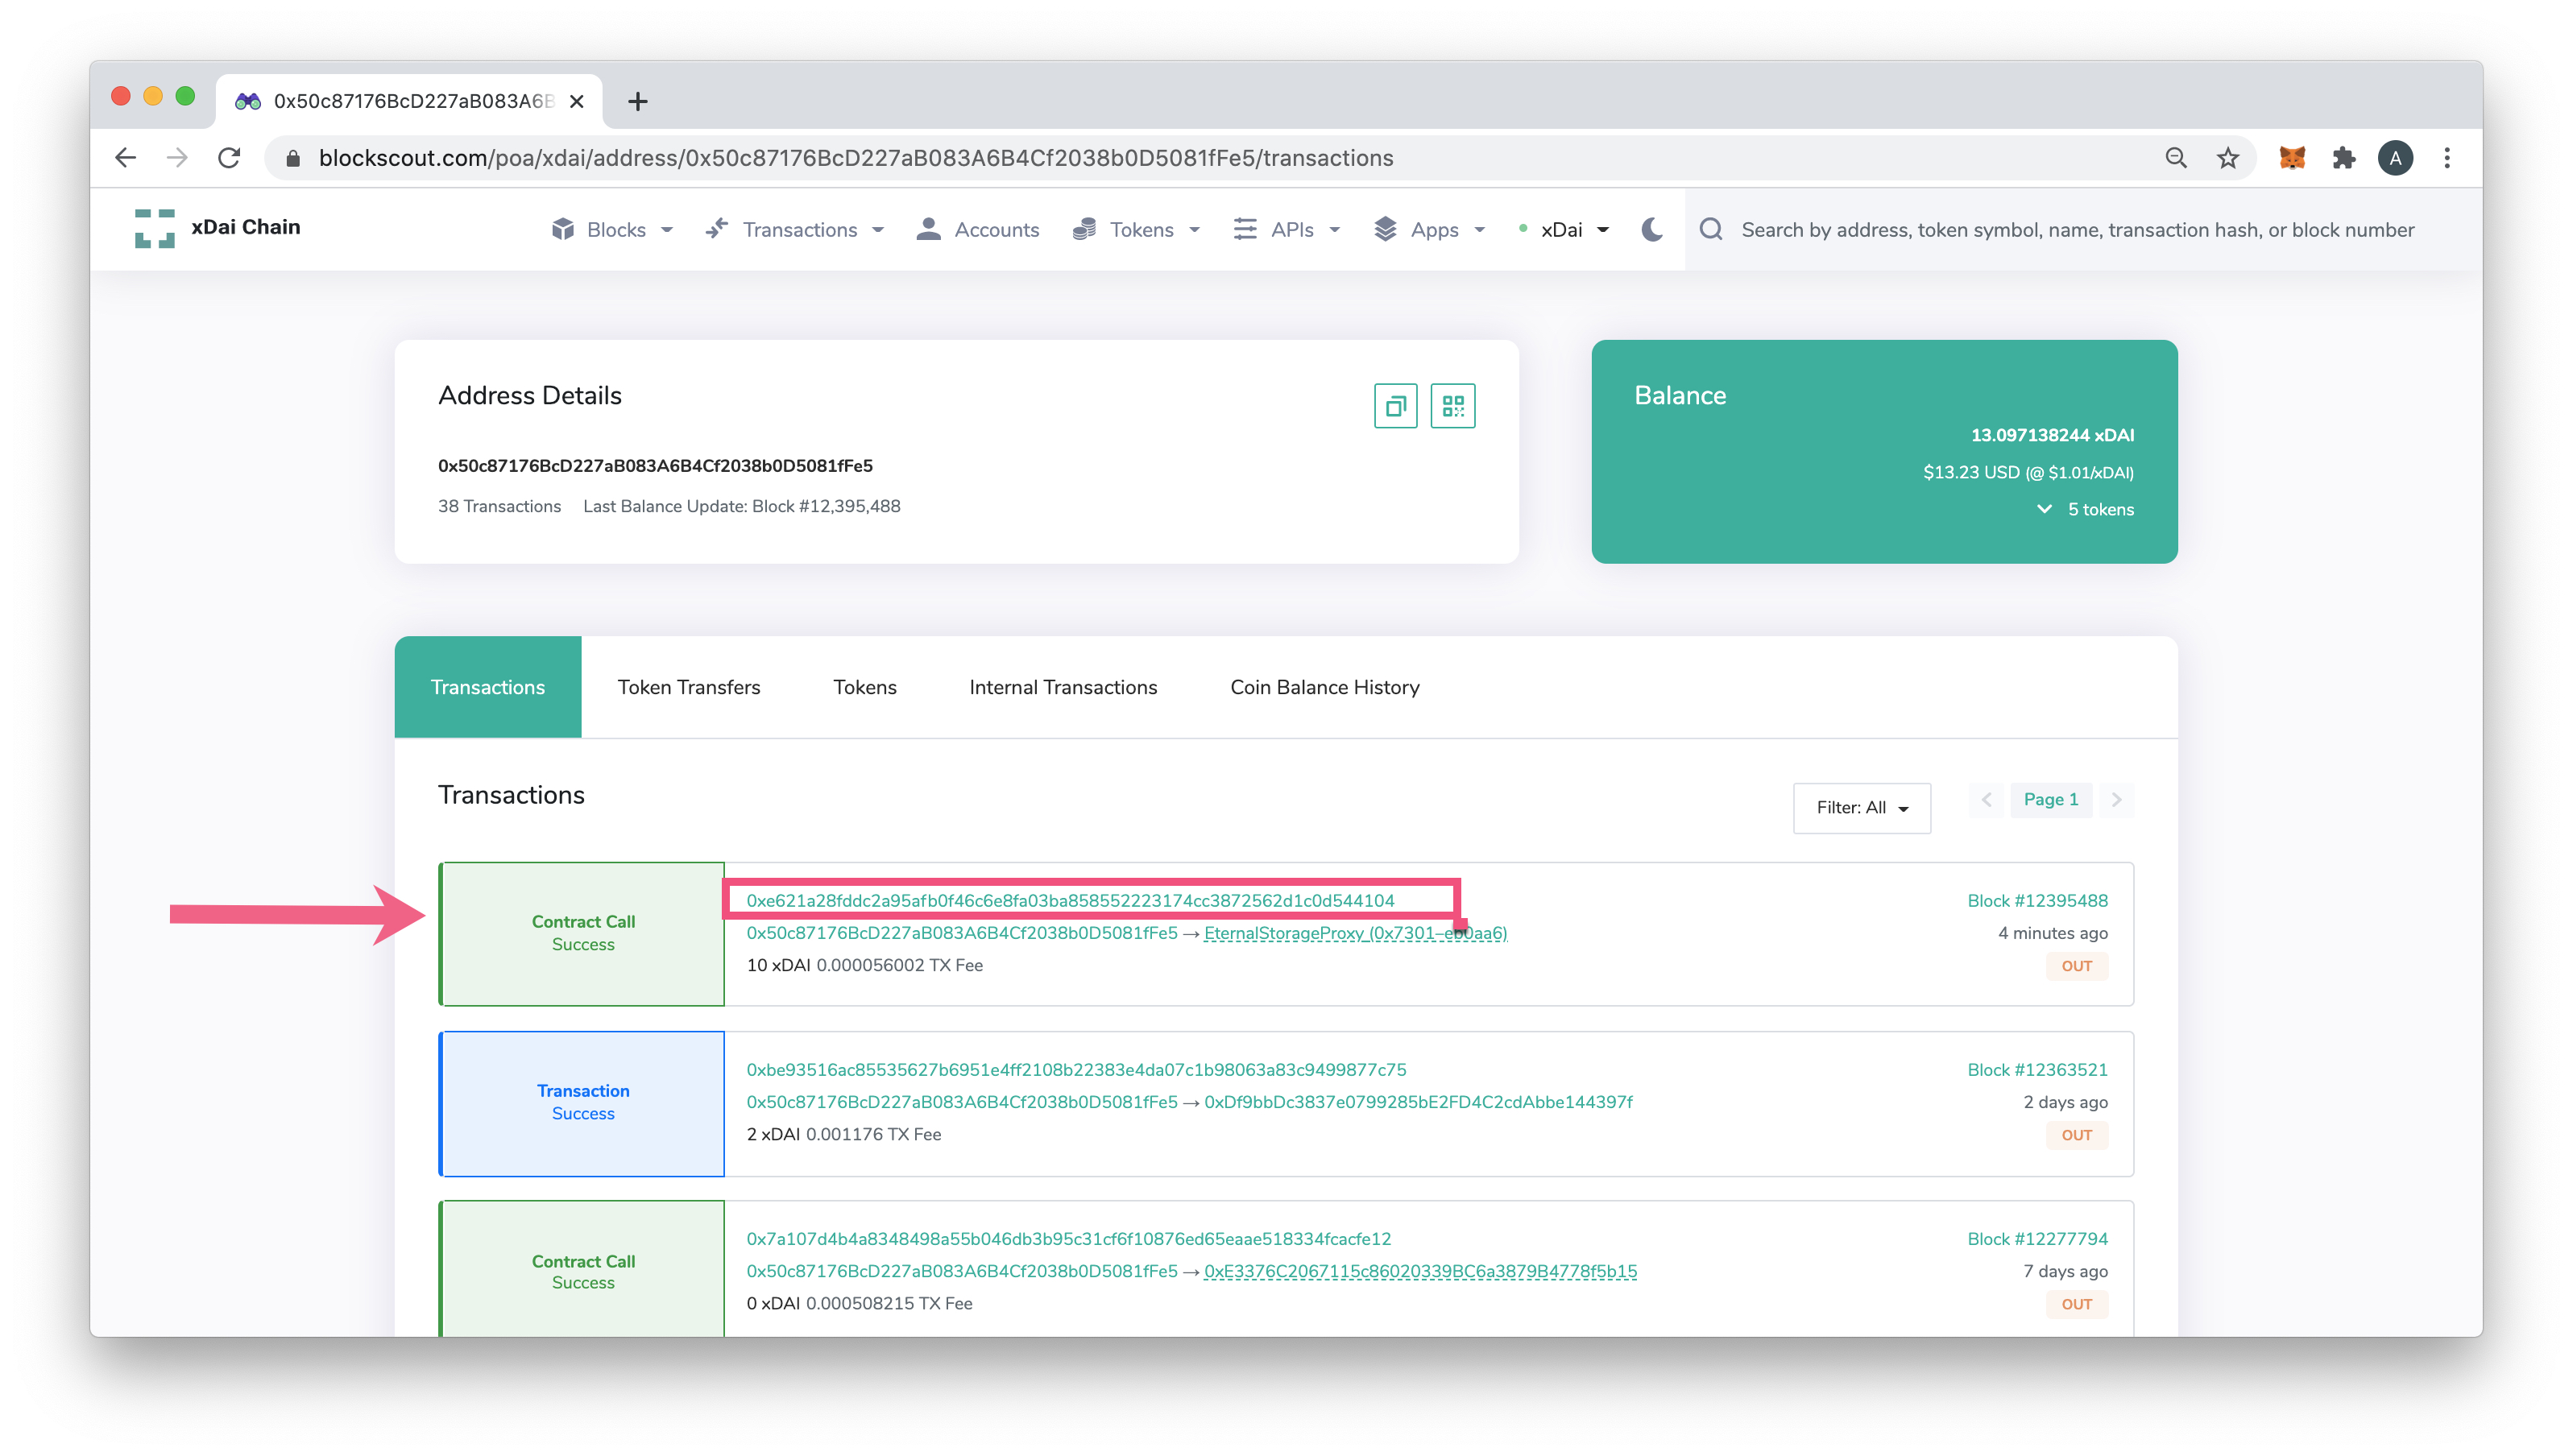
- Go to BlockScout at https://gnosis.blockscout.com/ and enter the address that originated the transaction (typically your wallet address). If you were using a contract to interact with the bridge (in this case use the contract that called the relayToken method) enter that address.
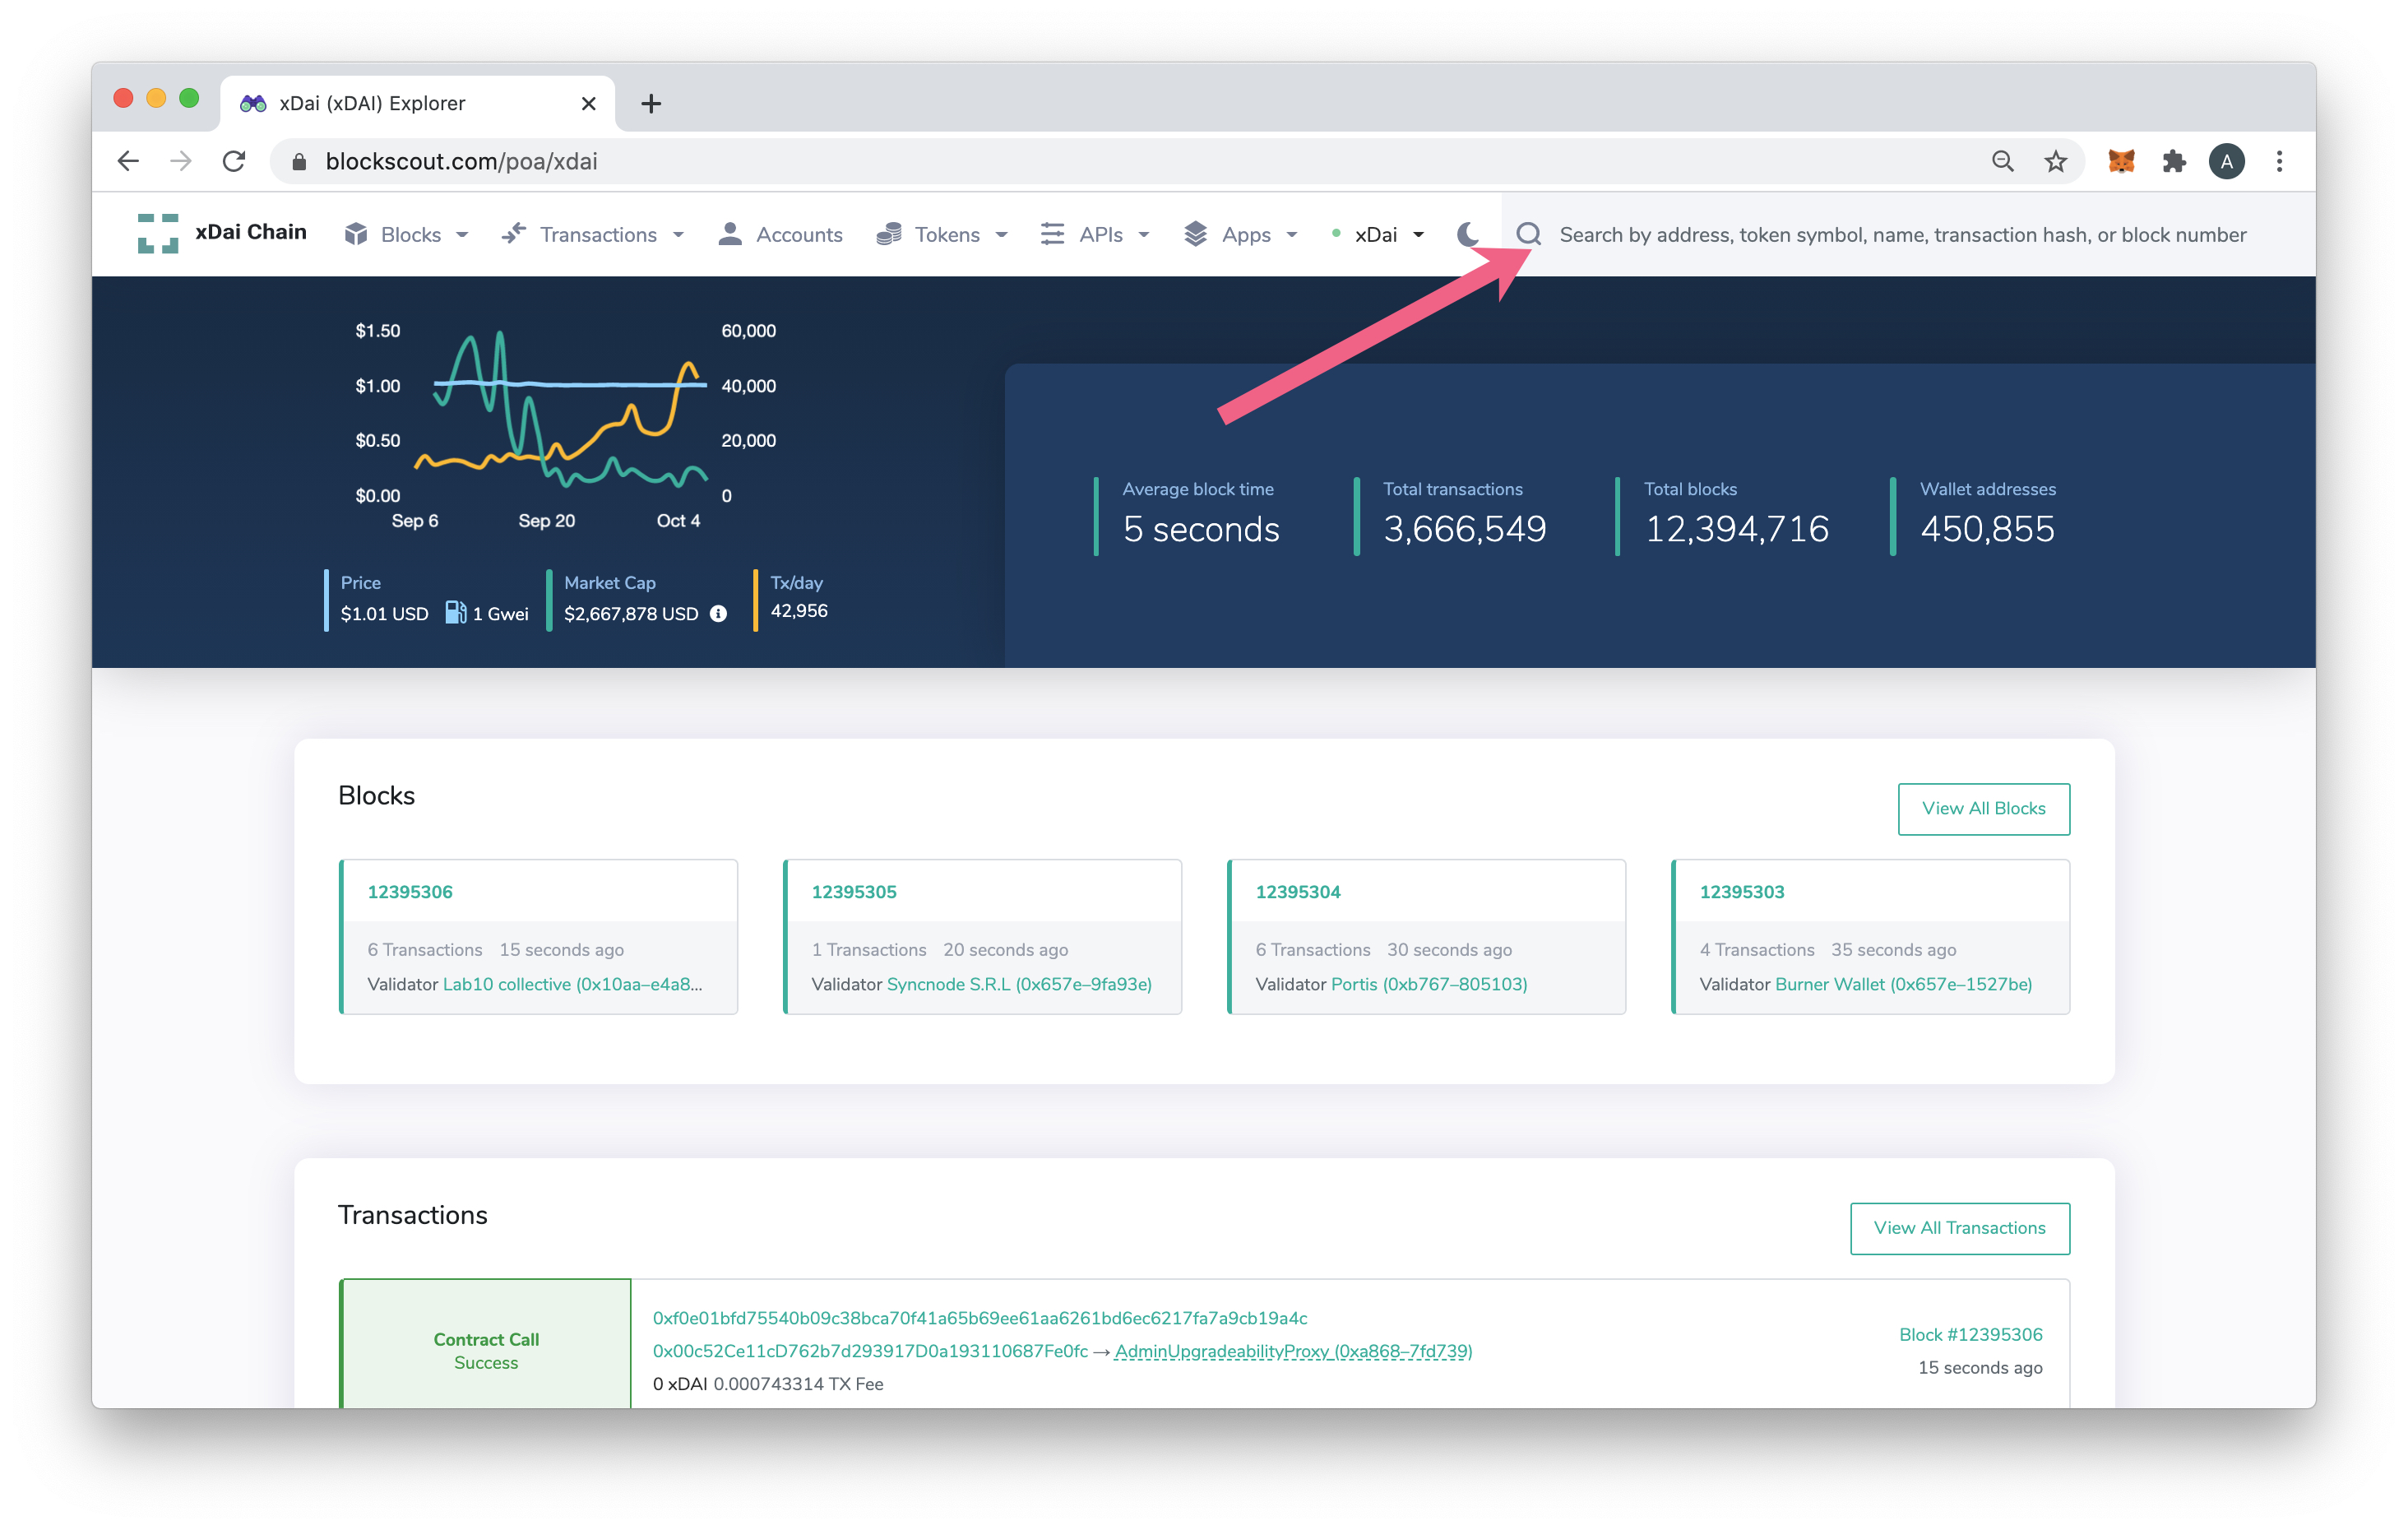
- You will see the transaction in the list (tx sent from your address to the EternalStorageProxy contract (
0x7301CFA0e1756B71869E93d4e4Dca5c7d0eb0AA6). Copy the tx hash.
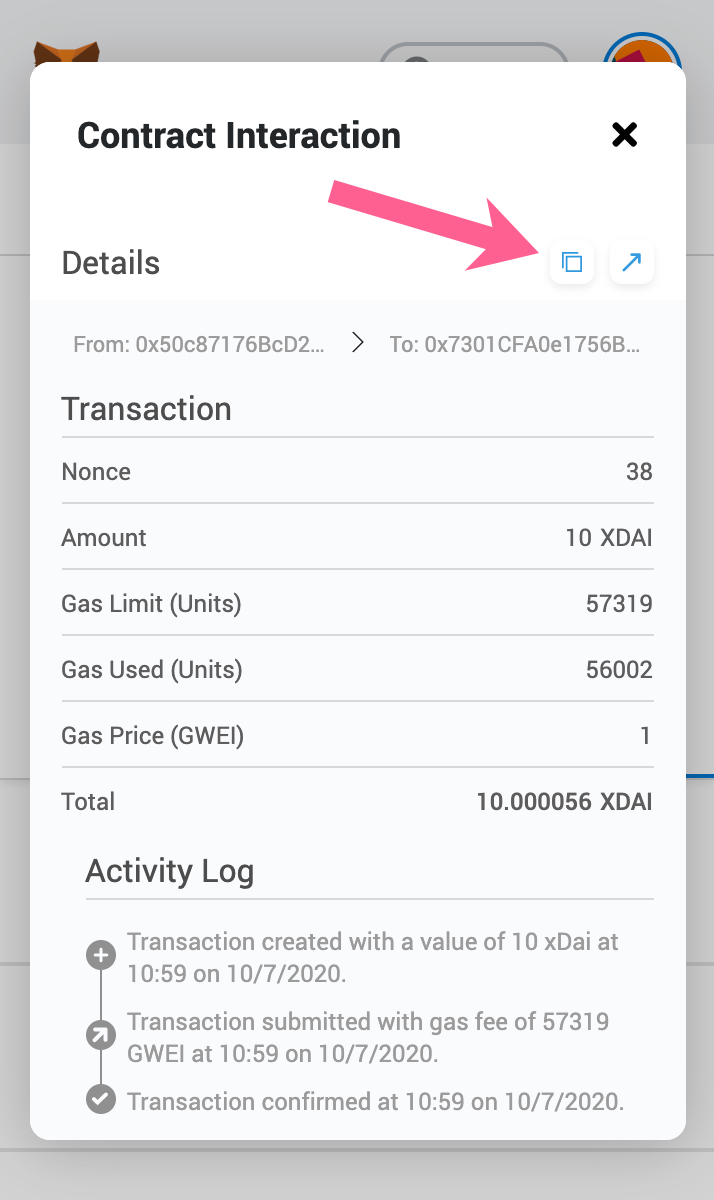
Find Transaction Hash in MetaMask
The process will be similar for other Ethereum wallets. Find your past transaction history and copy the tx hash for the Contract interaction.
-
Go to MetaMask and connect to Gnosis.
-
Click on the Contract Interaction TX in the activity tab of your account.
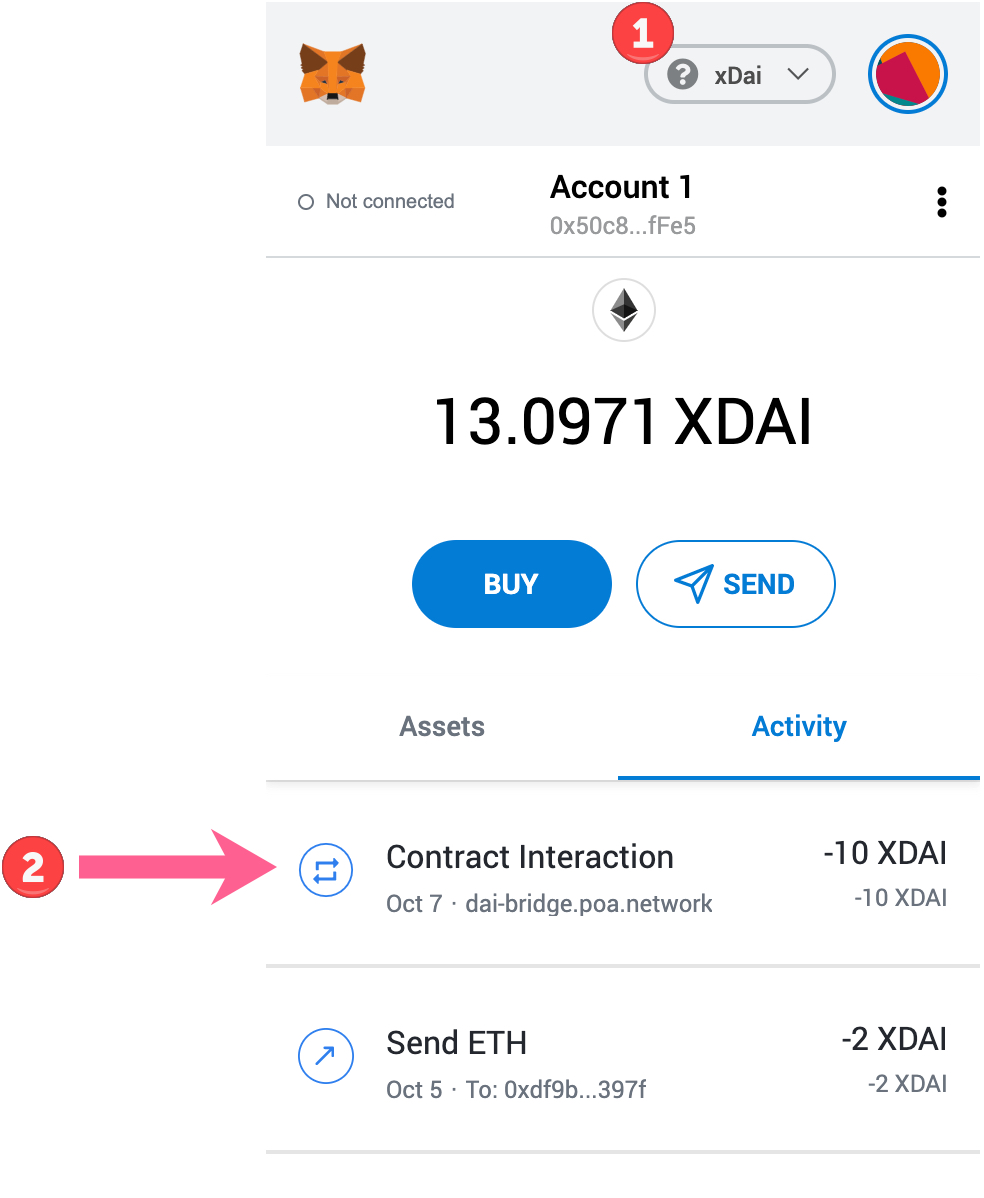
- Copy the Transaction ID (hash).
View Inbound (Dai to xDai) Transactions
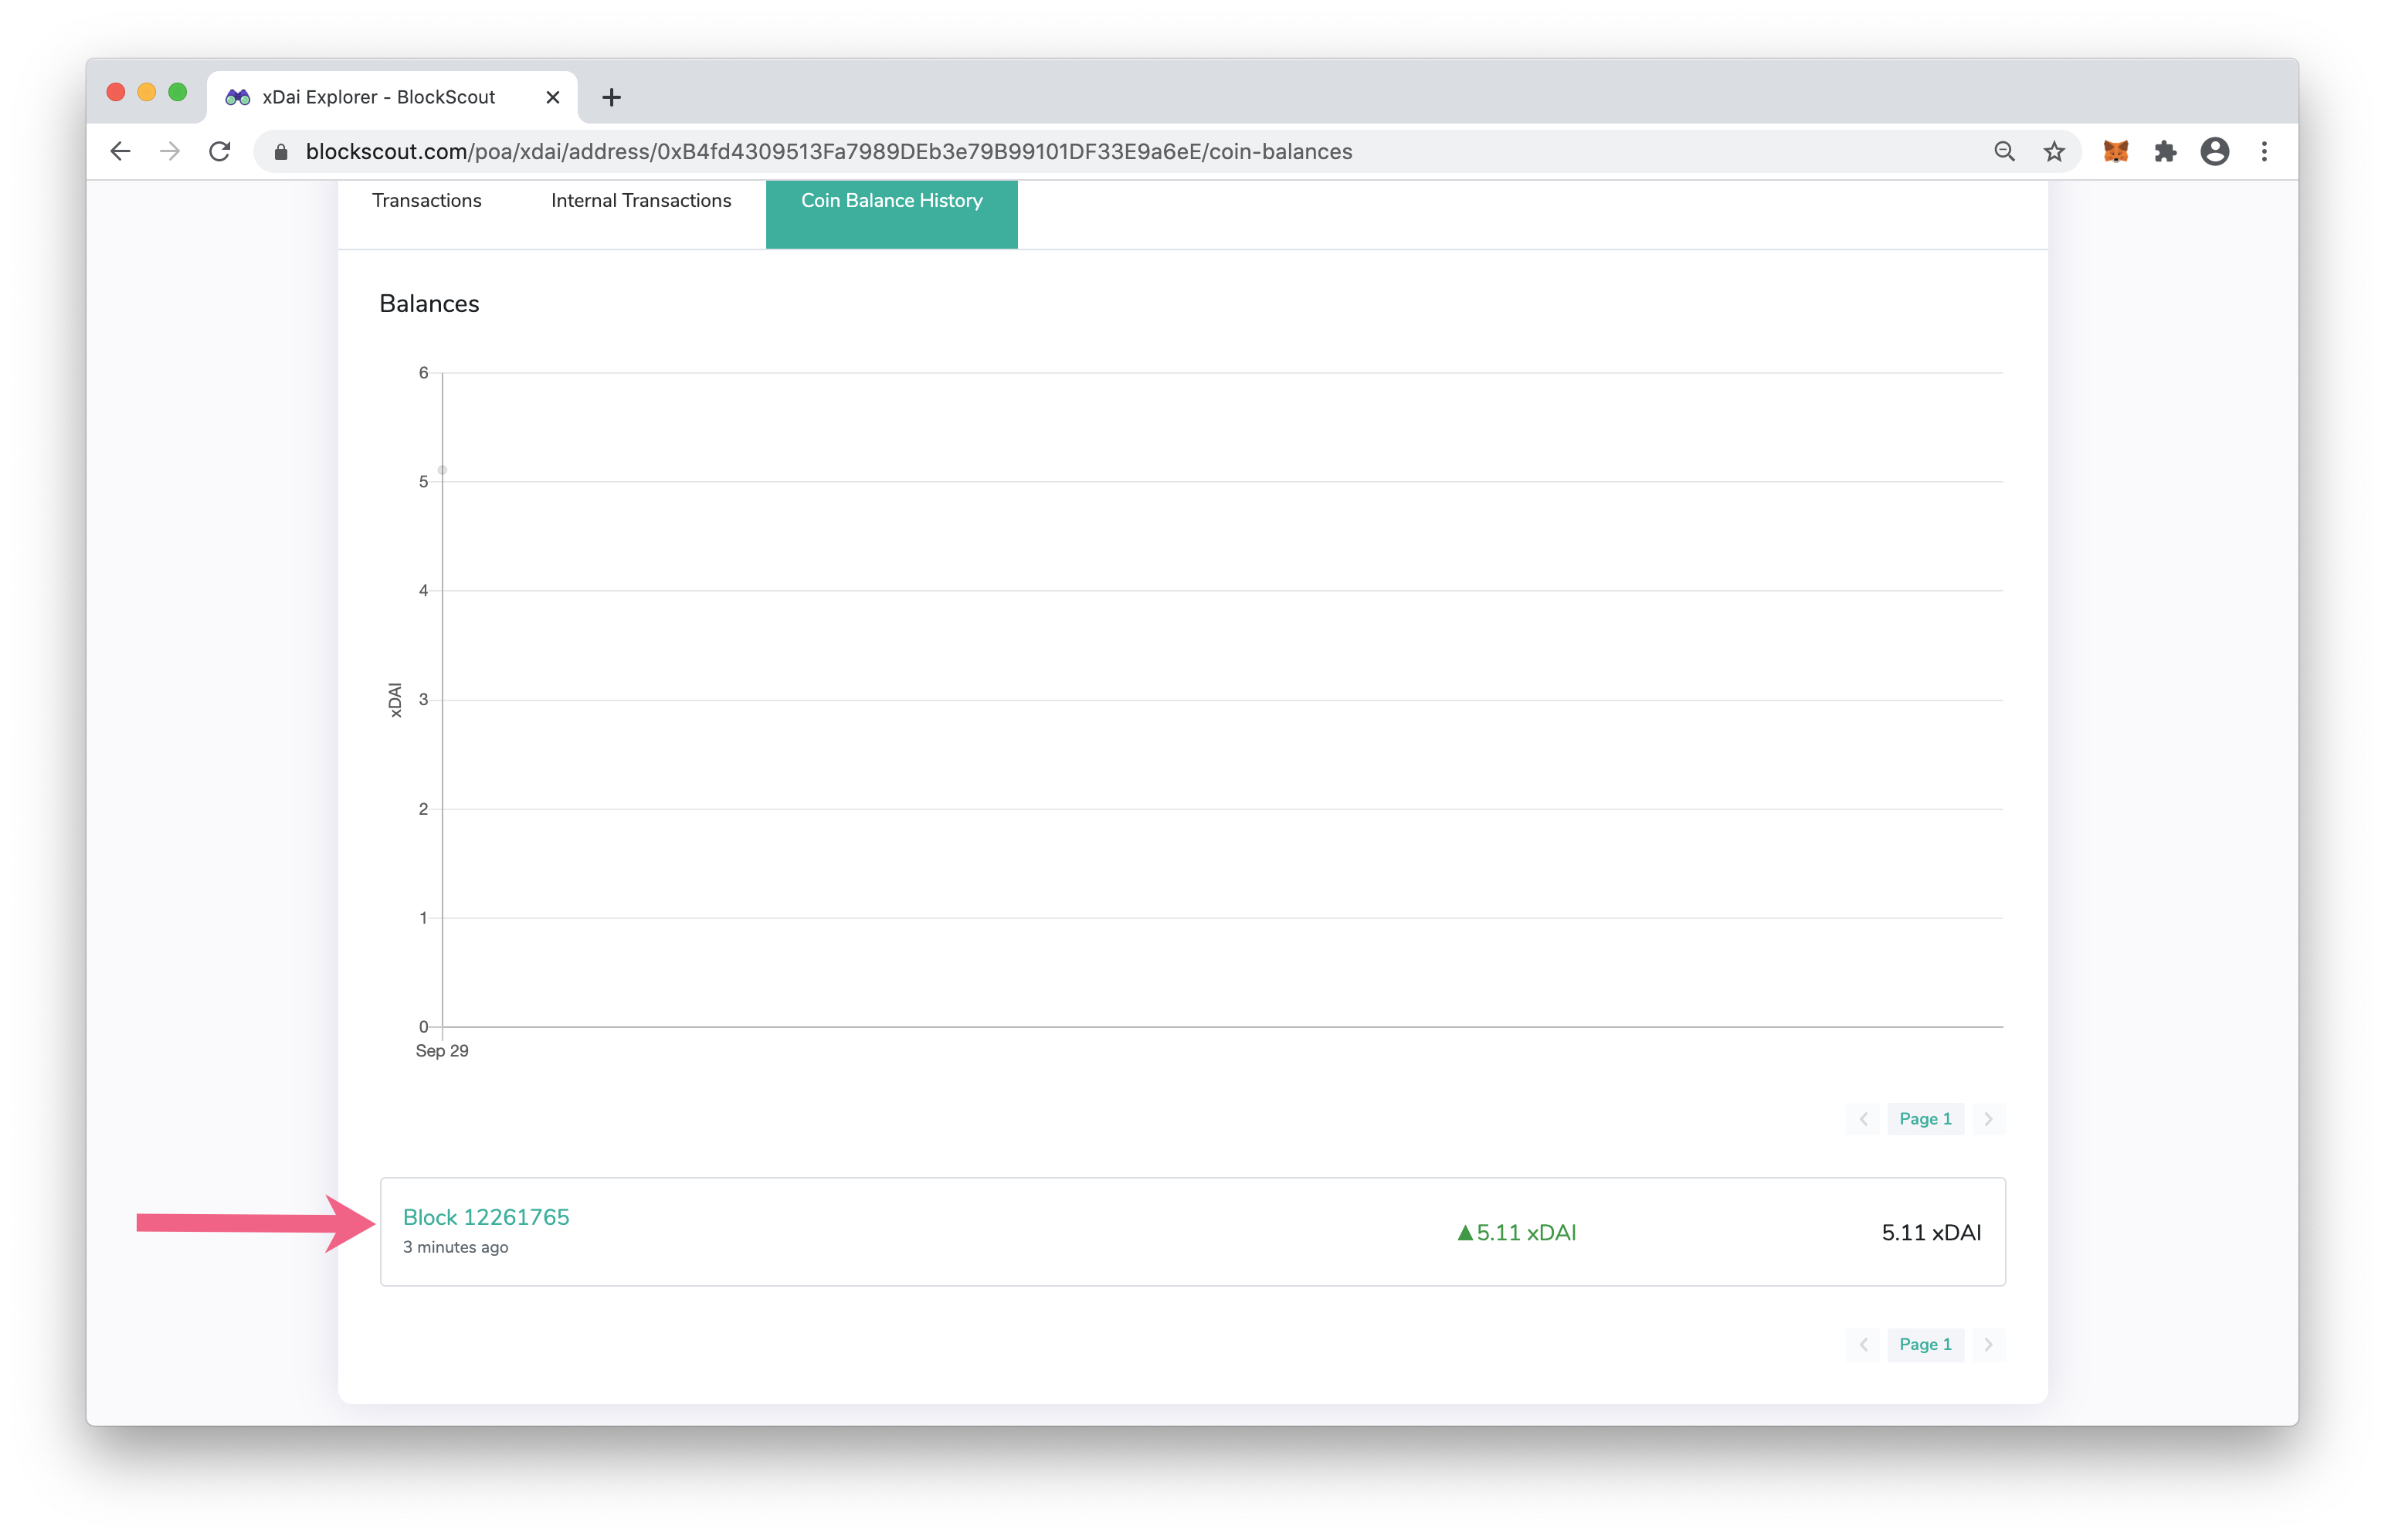
When Dai is transferred from Ethereum to xDai on Gnosis, the amount of Dai in your wallet will decrease and the corresponding amount of xDai will increase. However, the transaction will not appear on the xDai side of the wallet. The easiest way to track it is in BlockScout with the Coin Balance History view.
- Copy the account address used for the transaction.
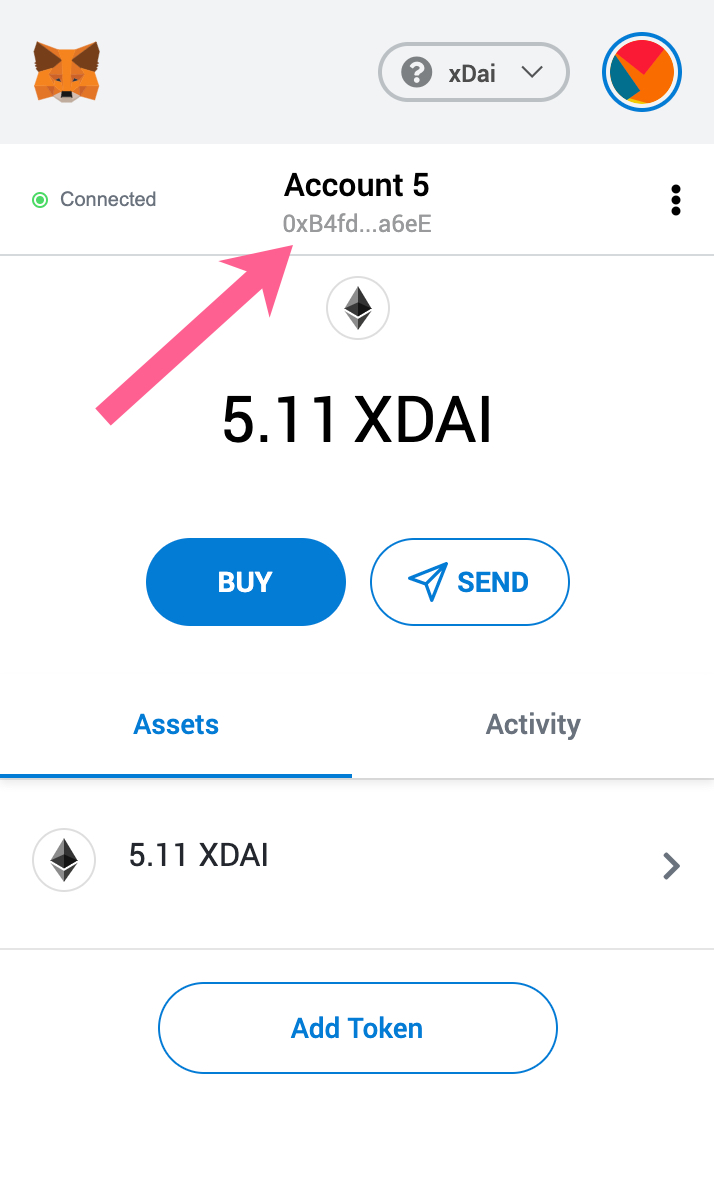
- Paste the address into BlockScout at https://gnosis.blockscout.com/.
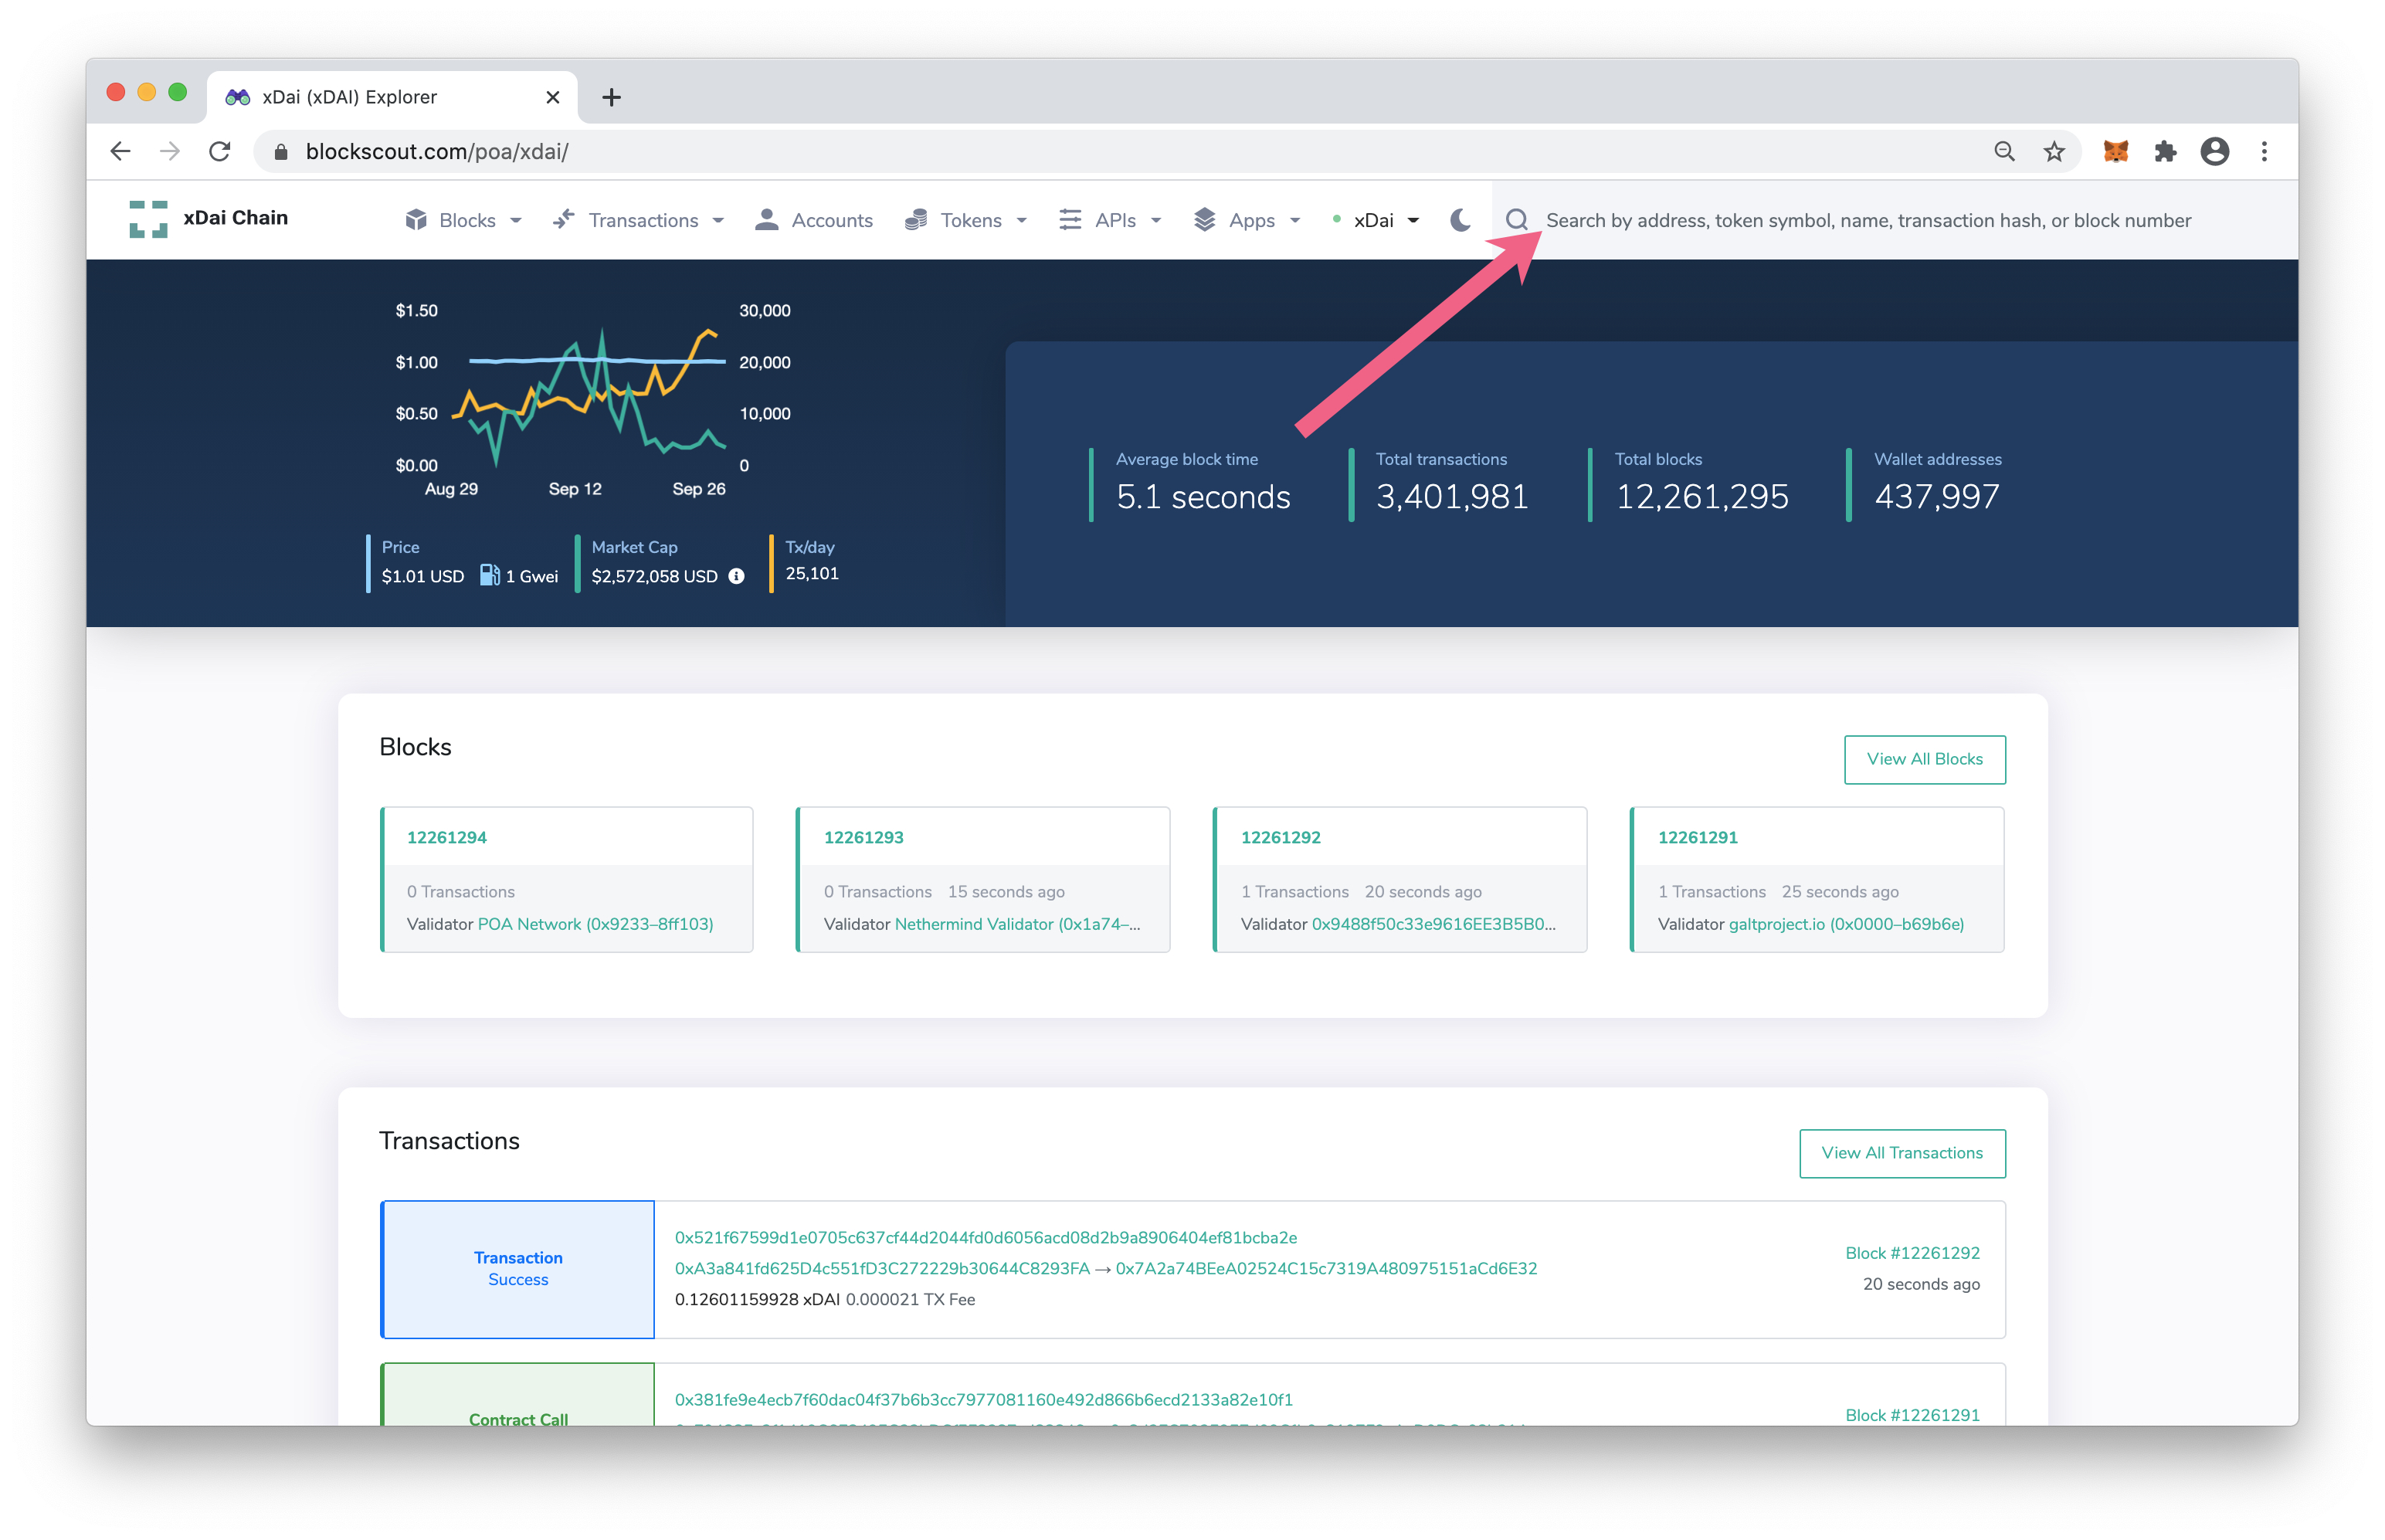
- Select Coin Balance History.
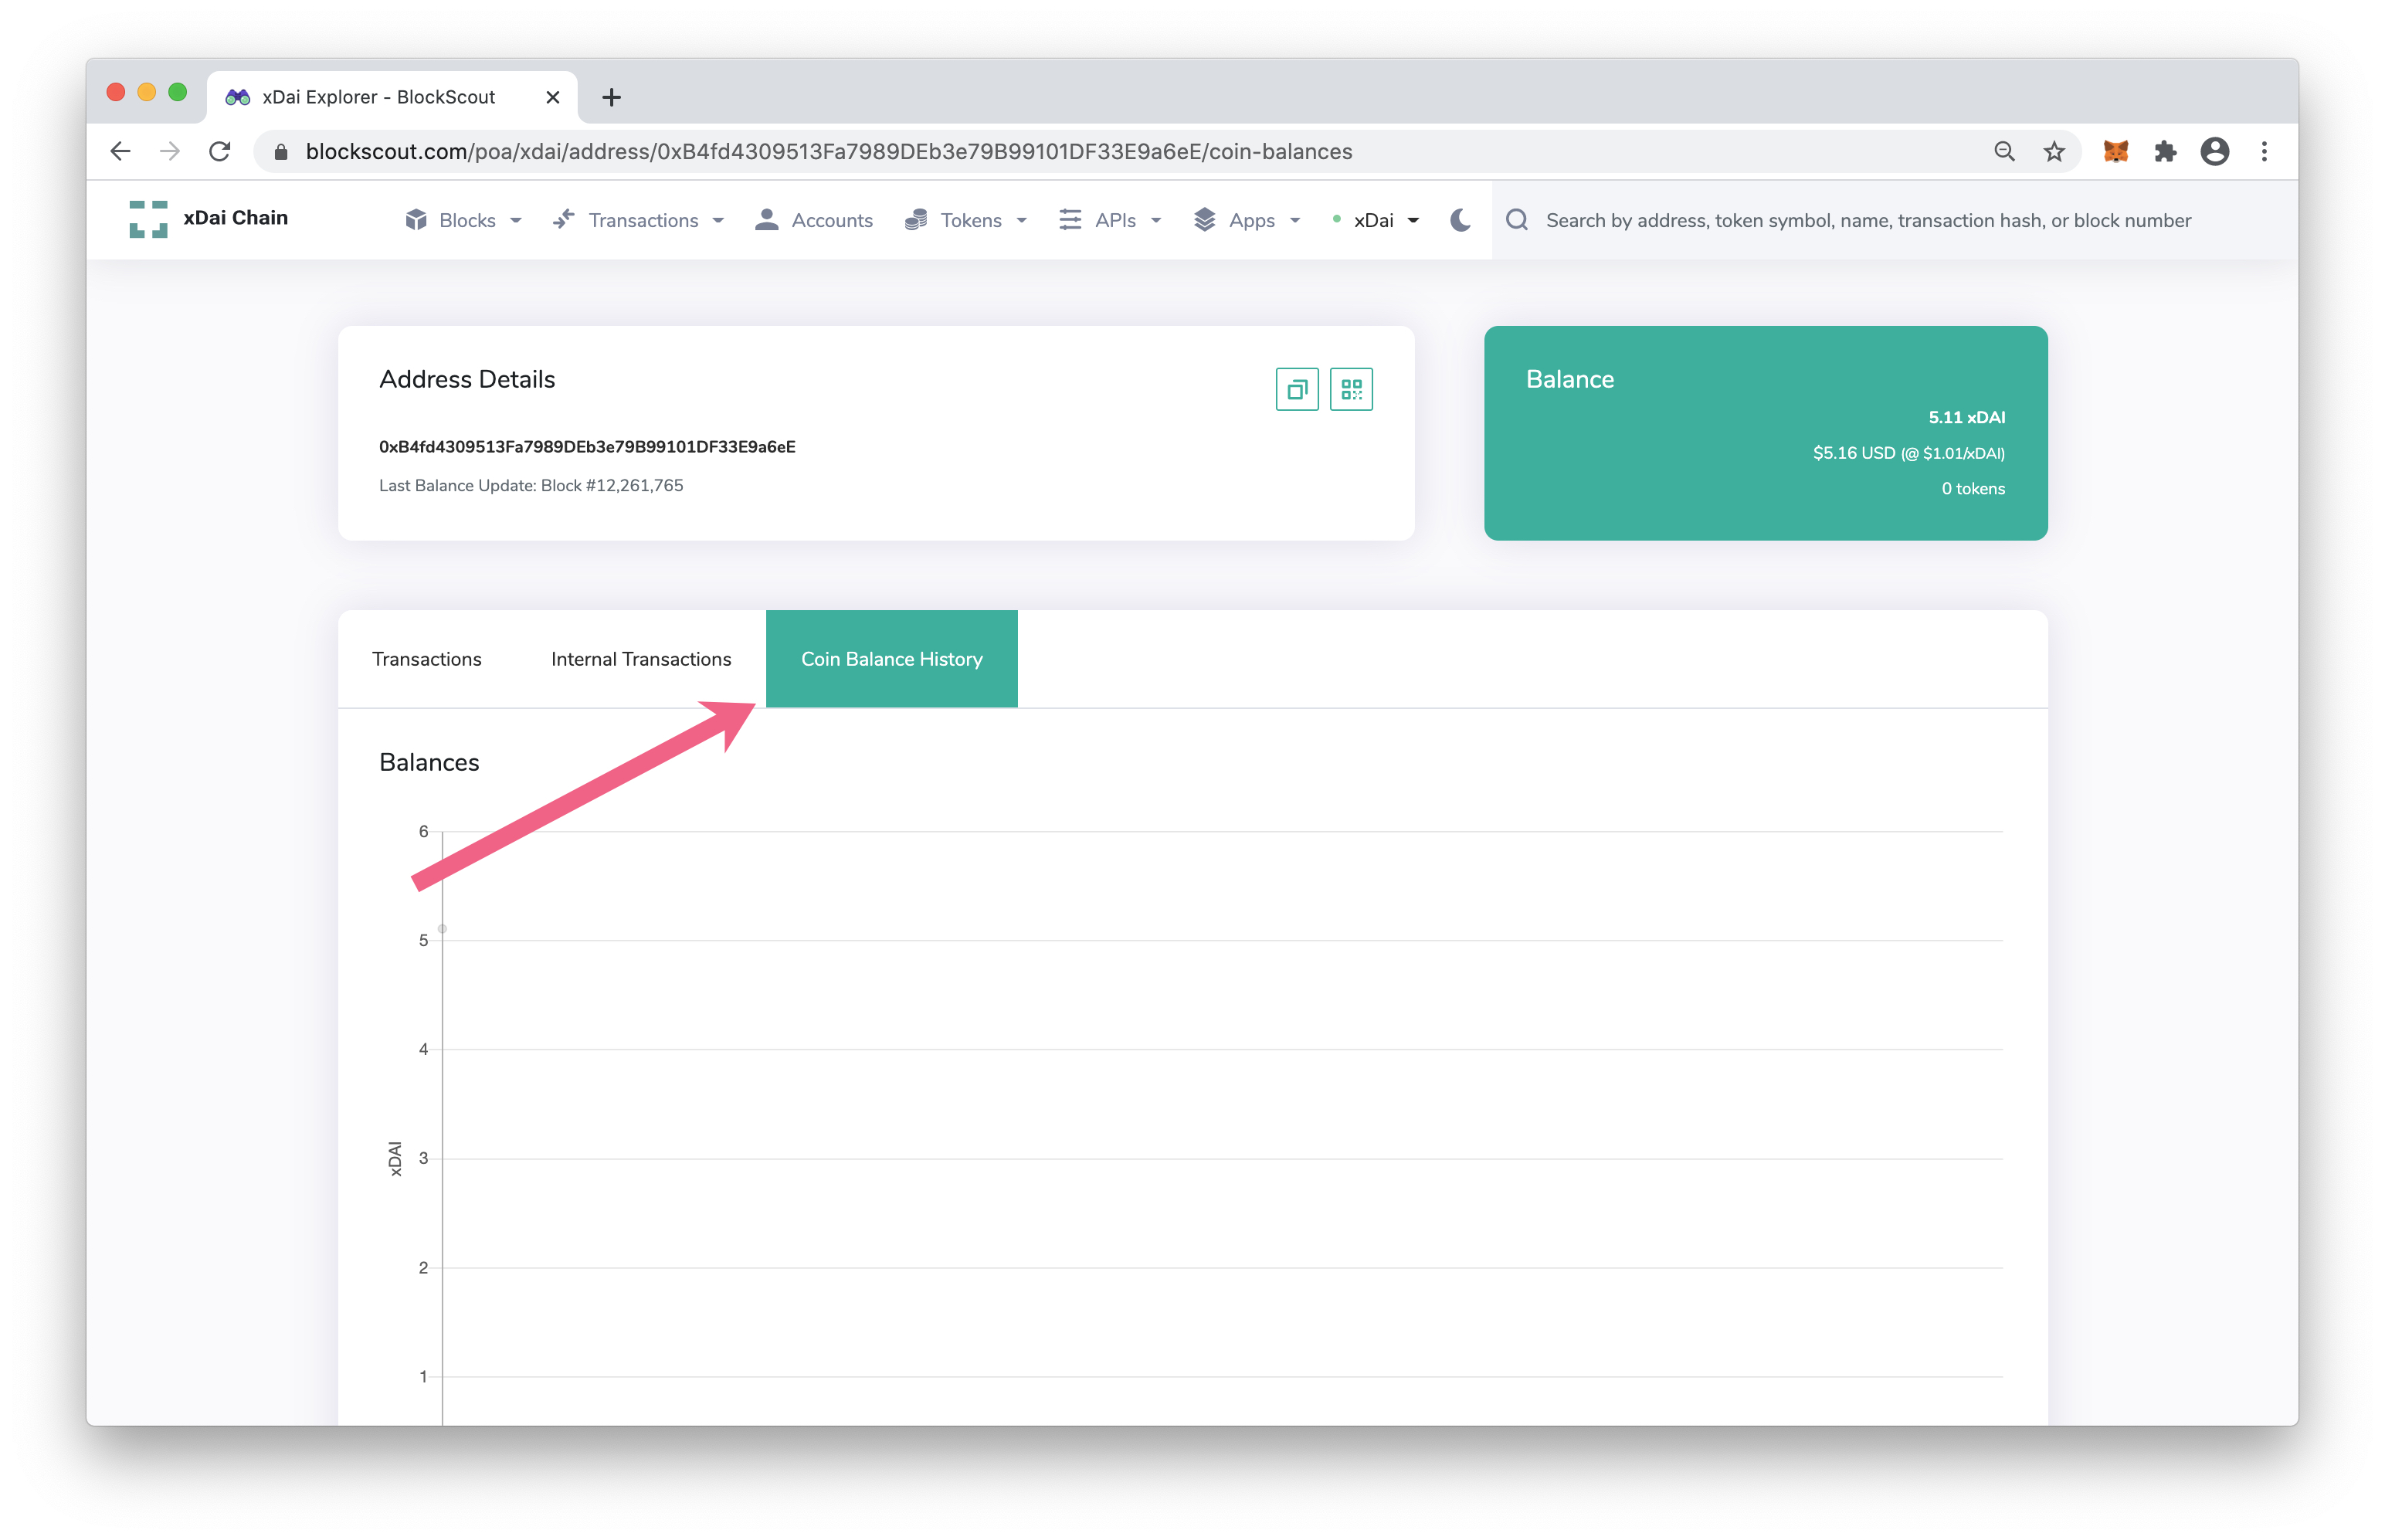
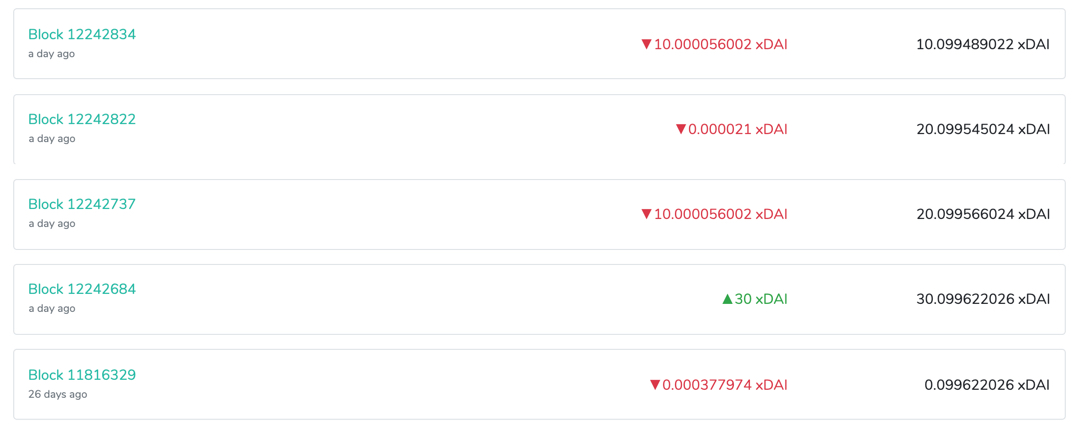
- Scroll down to see incoming and outgoing amounts. Your transaction should appear here.
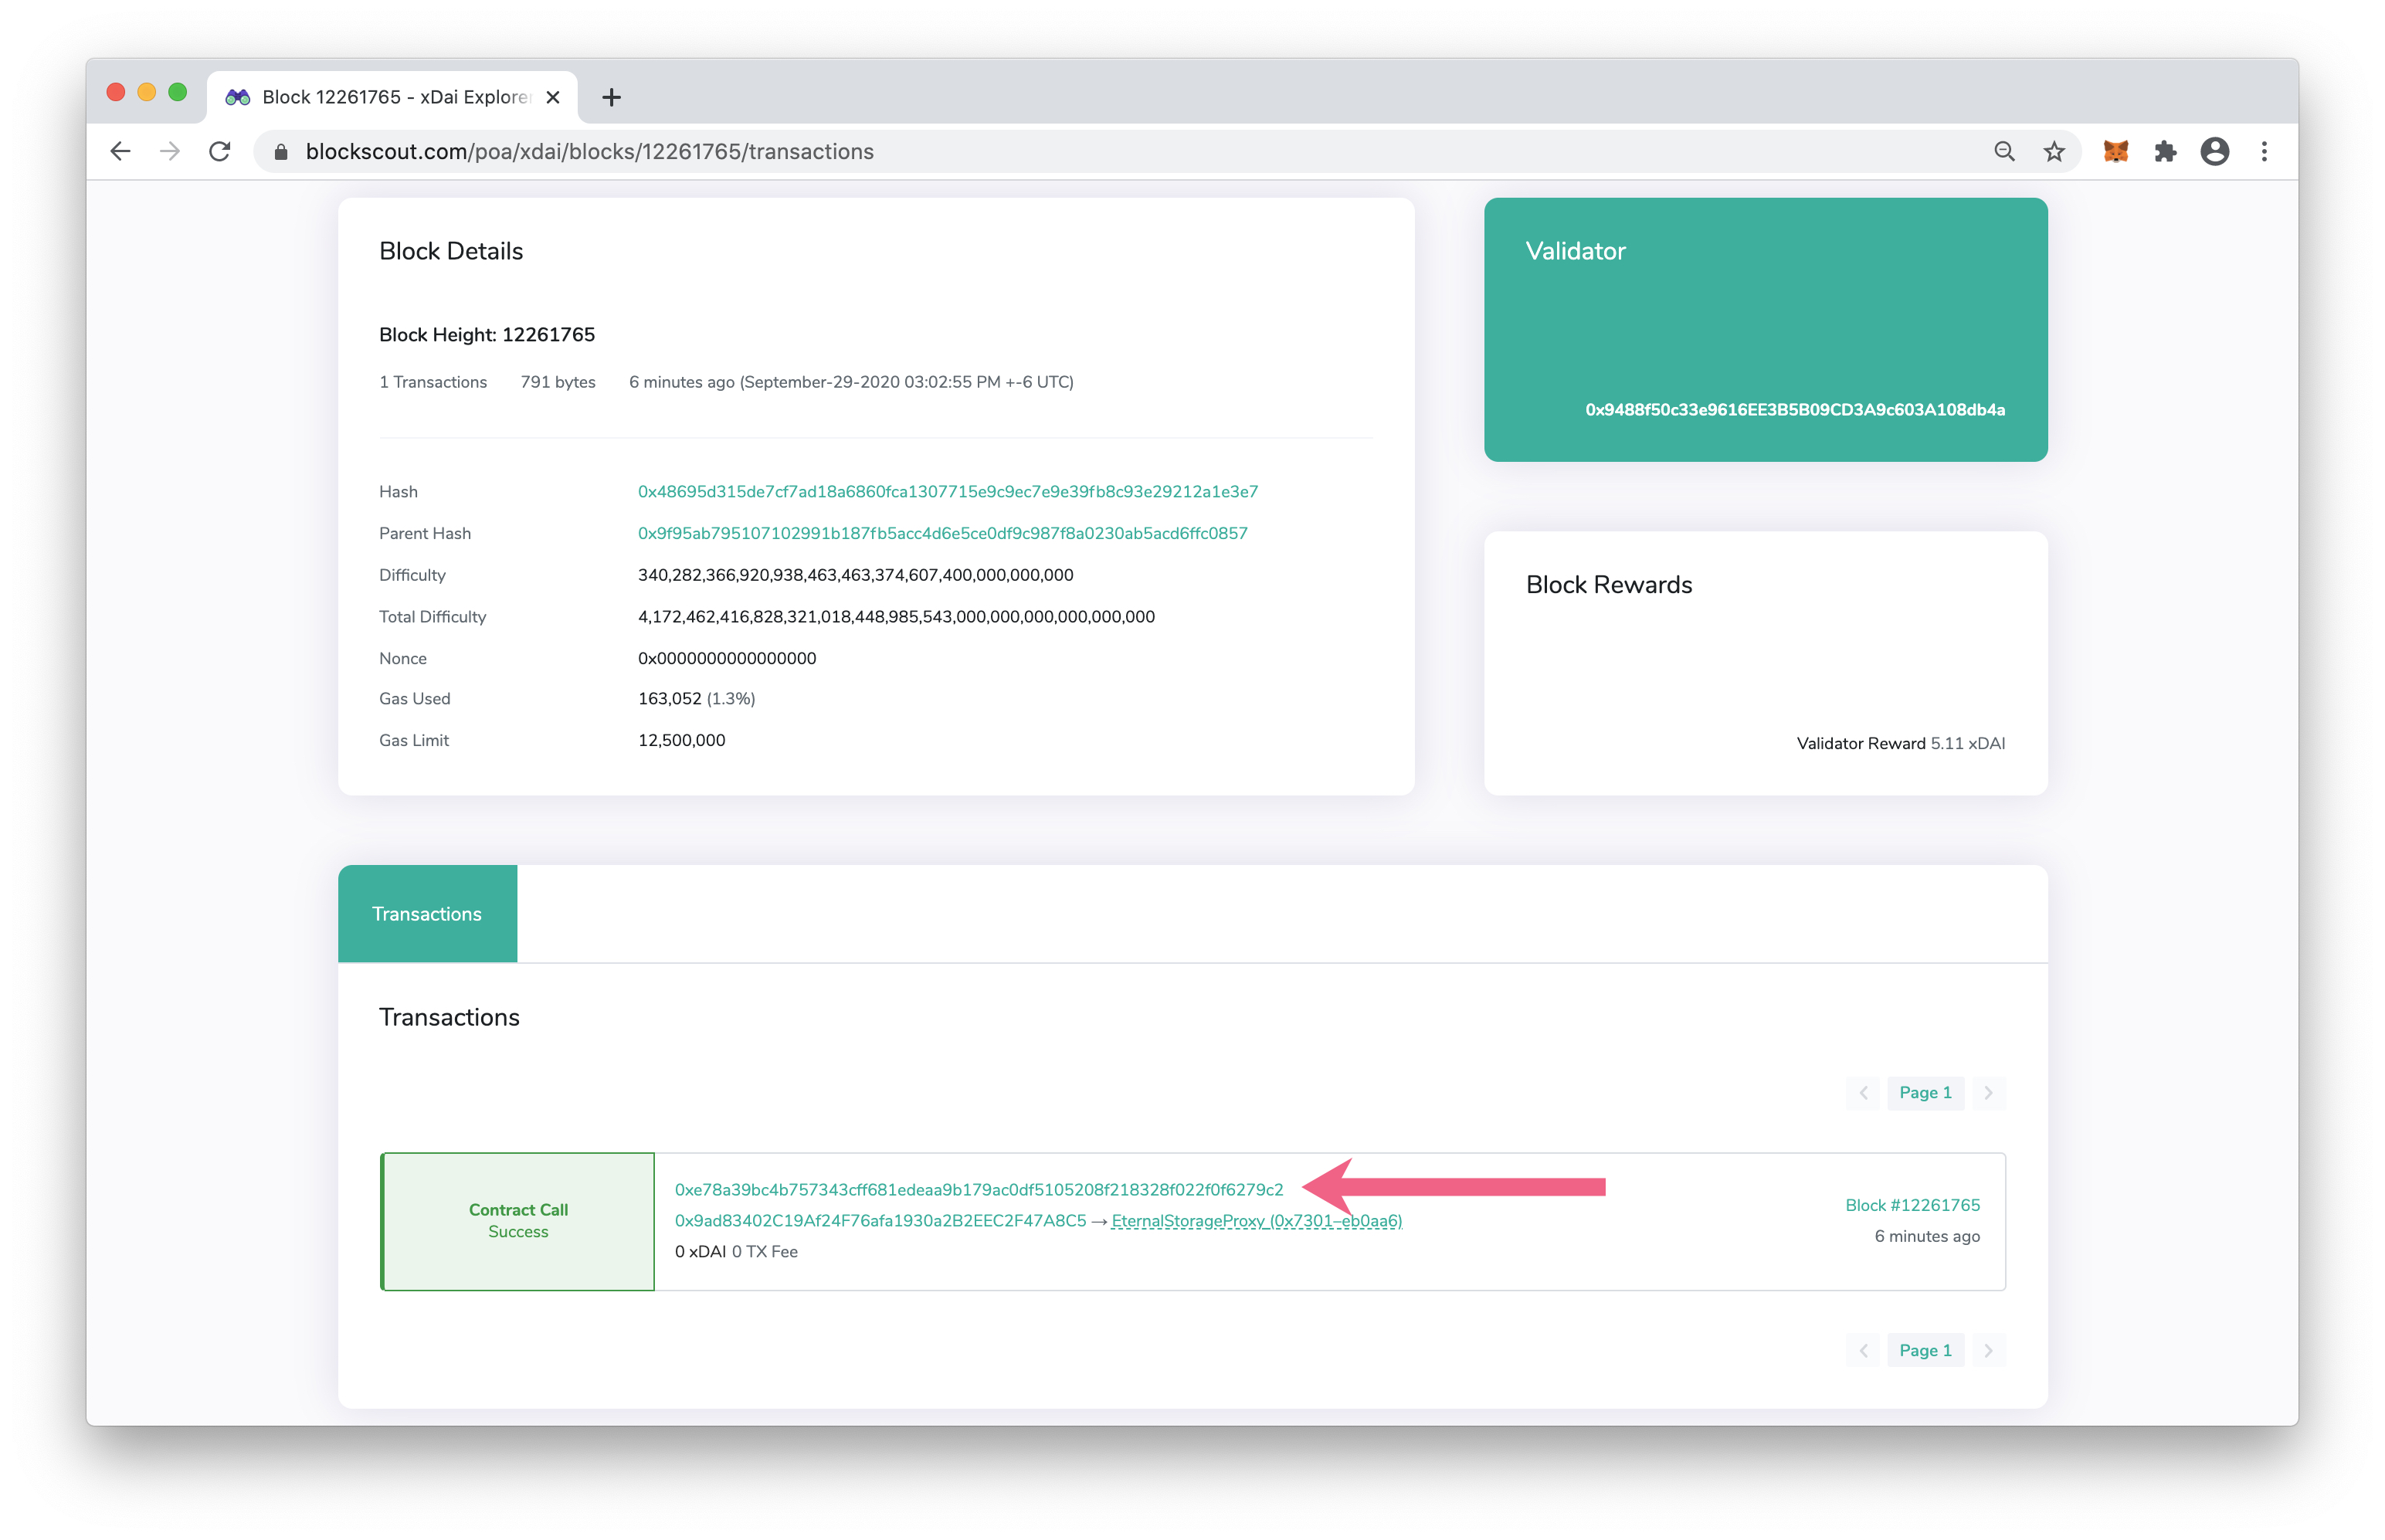
Red txs signify outgoing and green are incoming. You can click on the block number to find your transaction in the block if you'd like more information.
- Select a tx hash to view details.
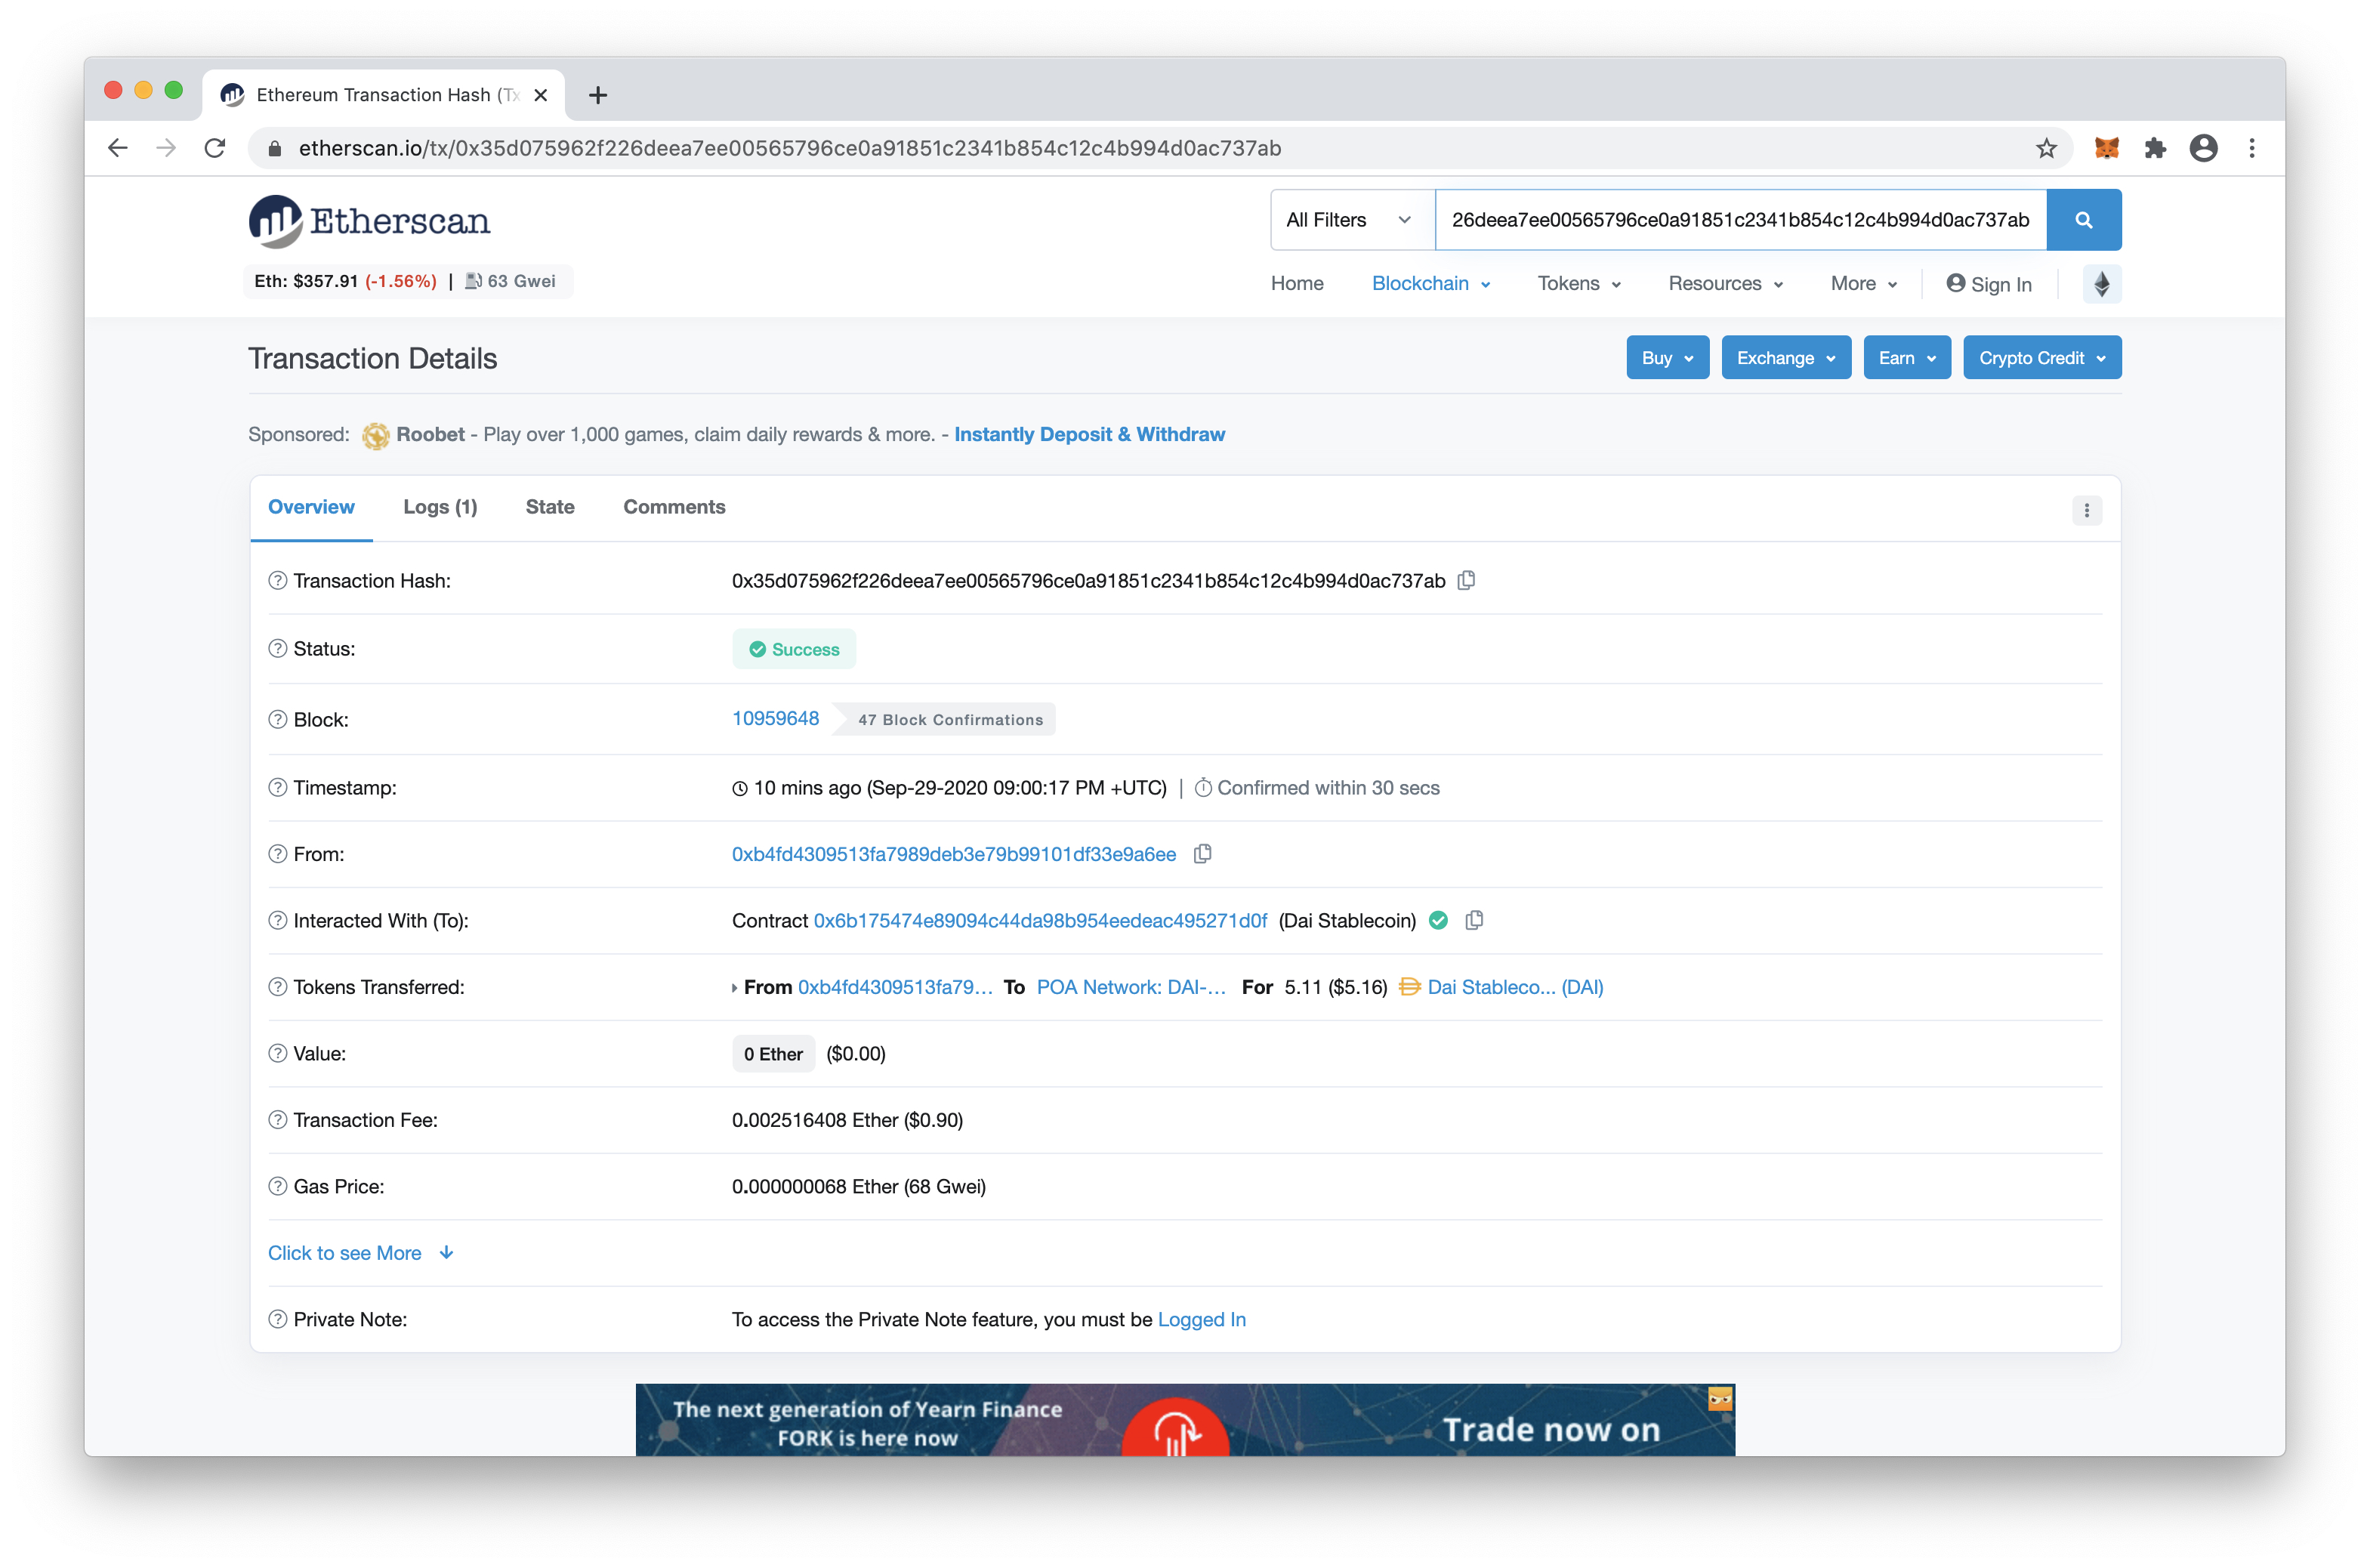
- Here you see the recipient address, the value, and the hash of the initiating tx on Ethereum.
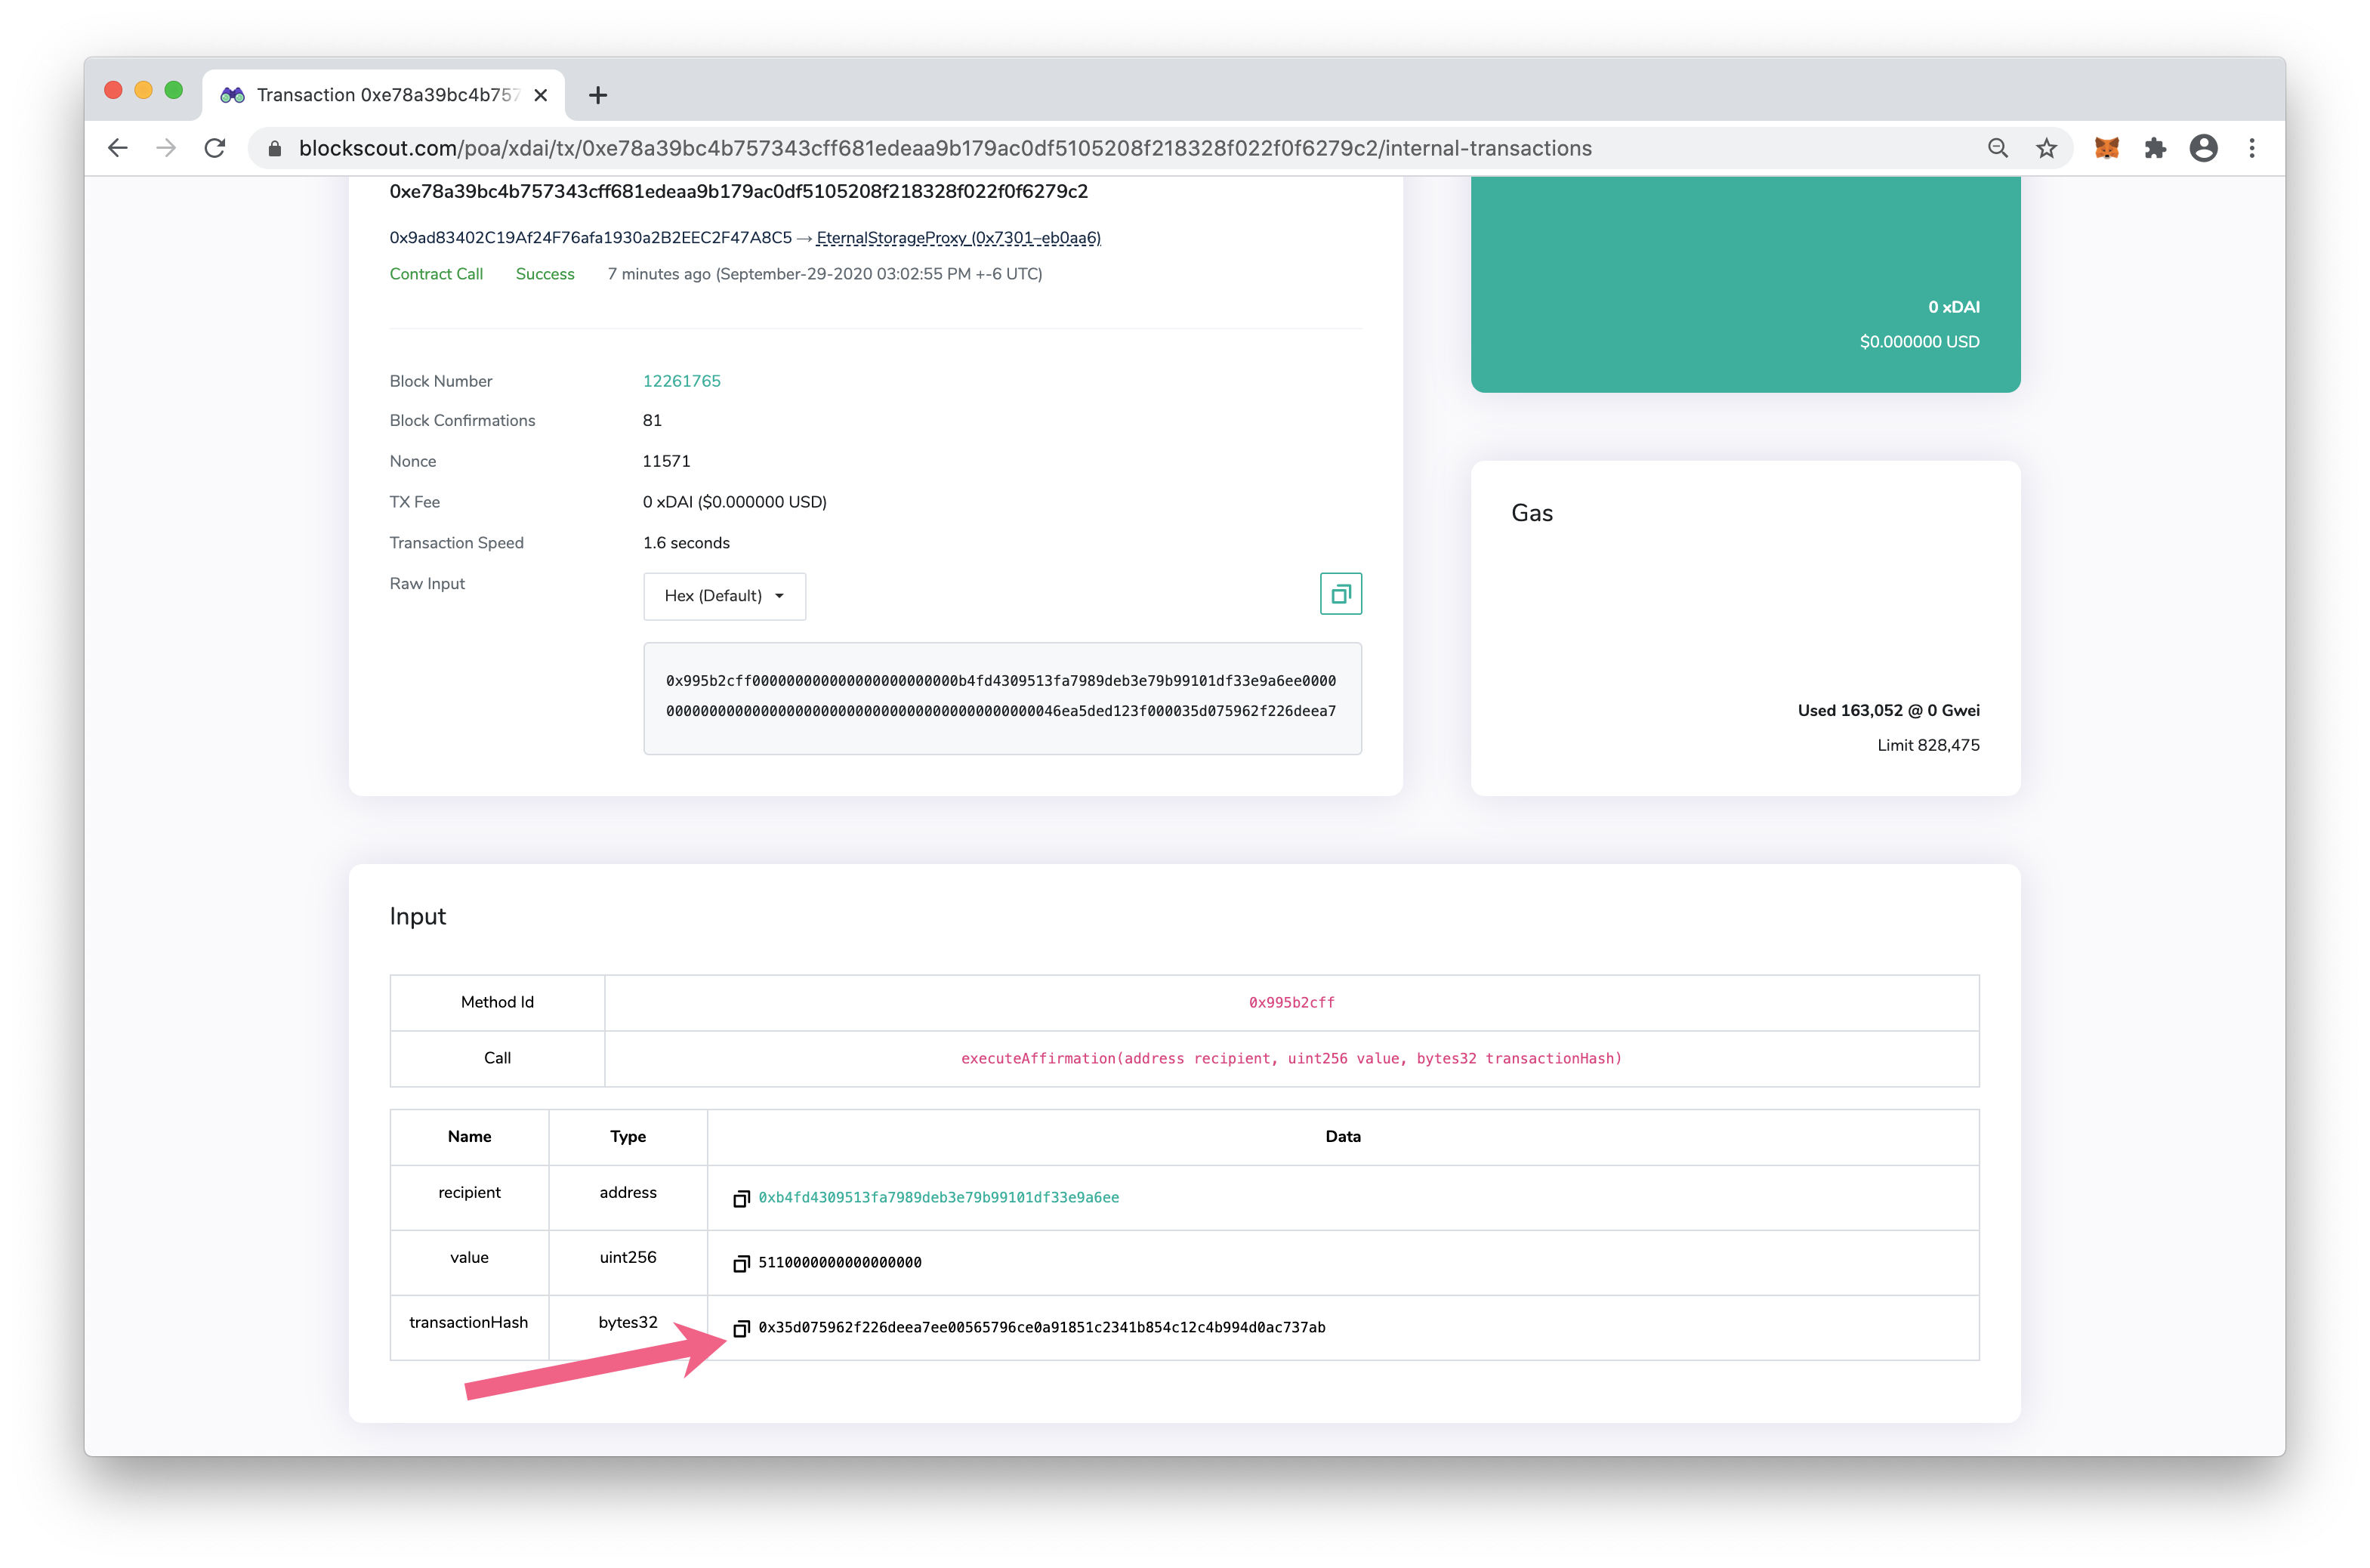
- This tx can be copy/pasted into Etherscan to see the initiating tx information.